Download the PHP package ivupcn/restina without Composer
On this page you can find all versions of the php package ivupcn/restina. It is possible to download/install these versions without Composer. Possible dependencies are resolved automatically.
FAQ
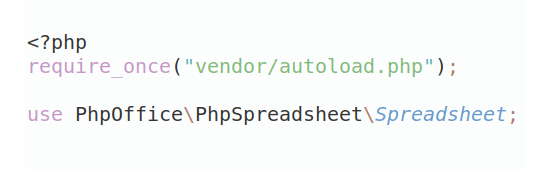
Example:
In general, it is recommended to use always a project to download your libraries. In an application normally there is more than one library needed.
- Some hosting areas are not accessible by a terminal or SSH. Then it is not possible to use Composer.
- To use Composer is sometimes complicated. Especially for beginners.
- Composer needs much resources. Sometimes they are not available on a simple webspace.
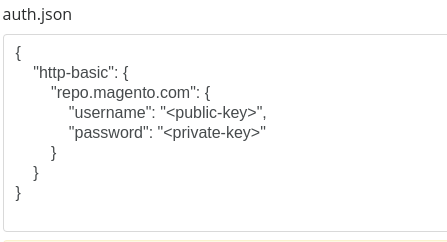
- If you are using private repositories you don't need to share your credentials. You can set up everything on our site and then you provide a simple download link to your team member.
- Simplify your Composer build process. Use our own command line tool to download the vendor folder as binary. This makes your build process faster and you don't need to expose your credentials for private repositories.
Informations about the package restina
Restina Framework
一个轻量级 PHP 框架,用于快速开发 API。
Restina是一个免费开源的,快速、简单的面向对象的轻量级PHP开发框架,是为了敏捷WEB应用开发和简化应用开发而诞生的。Restina秉承简洁实用的设计原则,在保持出色的性能和至简代码的同时,更注重易用性。遵循Apache2开源许可协议发布,意味着你可以免费使用Restina,甚至允许把你基于Restina开发的应用开源或商业产品发布/销售。
主要新特性
- 原生支持
PHP8.4+强类型(严格模式) - 支持更多的
PSR规范 - 系统服务注入支持
- ORM作为独立组件使用
- 全新的Hook系统
- 规范扩展接口
- 对IDE更加友好
- 支持 FrankenPHP Worker 模式
- 统一和精简大量用法
Restina的运行环境要求PHP8.4+。
安装
composer require ivupcn/restina配置 PSR-4 自动加载
安装完成后,需要在项目的 composer.json 文件中添加 PSR-4 命名空间映射配置:
{
    "autoload": {
        "psr-4": {
            "App\\": "app/"
        }
    }
}
然后运行以下命令重新生成自动加载文件:
composer dump-autoload使用 Nginx ,修改你的项目对应的配置:
location / {
    try_files $uri /index.php$is_args$args;
}
启动服务
cd /path/to/project
php restina run
然后就可以在浏览器中访问
http://localhost:8000如果需要更新框架使用
composer update ivupcn/restina快速入门
1. 创建项目
composer create-project ivupcn/restina my-api
cd my-api
2. 配置应用
编辑 app/config.php:
return [
    'app' => [
        'name'     => 'My API',
        'debug'    => true,          // 生产环境设为 false
        'timezone' => 'Asia/Shanghai',
        'cache'    => 'file',        // 'file' 或 'redis'
    ],
    'jwt' => [
        'secret'            => 'your-secret-key',
        'algorithm'         => 'HS256',
        'expire_time'       => 3600,
        'refresh_expire_time' => 7200,
    ],
    'database' => [
        'default' => 'mysql',
        'connections' => [
            'mysql' => [
                'driver'   => 'mysql',
                'host'     => '127.0.0.1',
                'port'     => 3306,
                'database' => 'my_app',
                'username' => 'root',
                'password' => '',
                'charset'  => 'utf8mb4',
            ],
        ],
    ],
    'redis' => [
        'host'     => '127.0.0.1',
        'port'     => 6379,
        'database' => 0,
    ],
];
3. 编写第一个控制器
在 app/controllers/ 下创建 HelloController.php:
4. 启动服务
# 内置服务器
php restina run

# 或 FrankenPHP Worker 模式(生产推荐)
frankenphp run
访问 http://localhost:8000/hello?name=Restina 即可看到响应。
5. 验证
# 运行测试
composer test

# 代码风格检查
composer cs-check

# 自动修复代码风格
composer cs-fix
目录结构
www  WEB部署目录(或者子目录)
├─app           应用目录
│  ├─commands           Cli控制器目录
│  ├─controllers        控制器目录
│  ├─filters            过滤器目录
│  ├─hooks              Hook目录
│  ├─job                队列任务目录
│  ├─middlewares        中间件目录
│  ├─models             模型目录
│  ├─scheduler          定时任务目录
│  ├─views              视图目录
│  ├─config.php         应用配置文件
│  ├─scheduler.php      定时任务配置文件
│  └─hooks.php          钩子配置文件
│
├─public                WEB目录(对外访问目录)
│  └─index.php          入口文件
│
├─extend                扩展类库目录
├─runtime               应用的运行时目录(可写,可定制)
├─vendor                Composer类库目录
├─composer.json         composer 定义文件
├─LICENSE               授权说明文件
├─README.md             README 文件
命名规范
Restina遵循PSR-2命名规范和PSR-4自动加载规范。
目录和文件
- 目录使用小写+下划线;
- 类库、函数文件统一以.php为后缀;
- 类的文件名均以命名空间定义,并且命名空间的路径和类库文件所在路径一致;
- 类(包含接口和Trait)文件采用驼峰法命名(首字母大写),其它文件采用小写+下划线命名;
- 类名(包括接口和Trait)和文件名保持一致,统一采用驼峰法命名(首字母大写);
函数和类、属性命名
- 类的命名采用驼峰法(首字母大写),例如 User、UserType;
- 函数的命名使用小写字母和下划线(小写字母开头)的方式,例如 get_client_ip;
- 方法的命名使用驼峰法(首字母小写),例如 getUserName;
- 属性的命名使用驼峰法(首字母小写),例如 tableName、instance;
- 特例:以双下划线打头的函数或方法作为魔术方法,例如 call 和 __autoload;
常量和配置
- 常量以大写字母和下划线命名,例如 APP_PATH;
- 配置参数以小写字母和下划线命名,例如 url_route_on 和url_convert;
- 环境变量定义使用大写字母和下划线命名,例如APP_DEBUG;
数据表和字段
- 数据表和字段采用小写加下划线方式命名,并注意字段名不要以下划线开头,例如 restina_user 表和 restina_name字段,不建议使用驼峰和中文作为数据表及字段命名。
请求流程
- 载入Composer的自动加载autoload文件
- 实例化系统应用基础类Restina\App
- 获取应用目录等相关路径信息
- 加载应用配置
- 设置运行环境
- 载入Hook配置
- 注册核心服务
- 注册自定义服务
- 启动服务
- 注册控制器
- 启动控制器
入口文件
Restina采用单一入口模式进行项目部署和访问,默认的应用入口文件位于public/index.php:
以上代码表示 HTTP 请求 GET /demo/getUsers,其实现为 DemoController::getUsers。
语法:#[Route(methods: <method>, path: <path>, code: <code>, permission: <permission>, jwt: <jwt>, autoRefreshToken: <autoRefreshToken>)]
#[Route] 标注在方法上,用于指定接口的路由。methods 为指定的 HTTP 方法,可以是 GET、HEAD、POST、PUT、PATCH、DELETE、OPTIONS。path 中可以带变量,用 {} 包围。
参数绑定
实现接口时,通常需要从 http 请求中提取数据,作为方法的输入参数,并将方法的返回值转换成 http 的输出。参数绑定功能即可以帮你完成上述工作。
输入绑定
根据方法定义绑定
默认情况下,框架会从http请求中提取和方法的参数名同名的变量,作为函数的参数。比如:
class DemoController
{
    #[Route(methods: ['GET'], path: '/demo/getUsers', code: 'demo.getUsers', permission: false, jwt: false, autoRefreshToken: true)]
    public function getUsers(int $page = 1, int $limit = 10, string $sort = 'id', string $search = '')
}
上述代码,对应的 http 请求形式为 GET /demo/getUsers/?page=1&limit=10&sort=id&search=test。
Params
     #[Route(methods: ['GET'], path: '/demo/getUsers', code: 'demo.getUsers', permission: false, jwt: false, autoRefreshToken: true)]
     #[Params(field: 'page', title: '页码', type: FieldType::INTEGER)]
     #[Params(field: 'limit', title: '分页大小', type: FieldType::INTEGER)]
     #[Params(field: 'sort', title: '排序字段', type: FieldType::STRING)]
     #[Params(field: 'search', title: '搜索内容', type: FieldType::STRING)]
    public function getUsers(int $page = 1, int $limit = 10, string $sort = 'id', string $search = '')
以上代码,除了绑定变量外,还指定了变量类型,即如果输入值无法转换成 int,将返回 400 BadRequest 错误。未指定@param 时,参数的类型默认为 mixed。
如果想指定某个输入参数可选,只需给方法参数设置一个默认值。
默认情况下,函数的返回值将 jsonencode 后,作为 body 输出。
参数校验
在"参数绑定"时,其实已经支持了两项基本的校验(类型和是否必选),如果要支持更复杂的校验规则,可以通过 #[Params(rules: '')] 指定,如:
/**
     #[Route(methods: ['GET'], path: '/demo/getUsers', code: 'demo.getUsers', permission: false, jwt: false, autoRefreshToken: true)]
     #[Params(field: 'page', title: '页码', type: FieldType::INTEGER, rules: 'min:1|integer|required')]
     #[Params(field: 'limit', title: '分页大小', type: FieldType::INTEGER, rules: 'min:1|max:100|integer|required')]
     #[Params(field: 'sort', title: '排序字段', type: FieldType::STRING, rules: 'in:id,name,email|optional')]
     #[Params(field: 'search', title: '搜索内容', type: FieldType::STRING, rules: 'lengthMax:50|optional')]
    public function getUsers(int $page = 1, int $limit = 10, string $sort = 'id', string $search = '')
语法
rules=[:param0[,param1...]][|<rule2>...]
- 多个规则间用|分割。
- 规则和其参数间用:分割, 如果有多个参数,参数间用,分割。
支持的规则
- required - Required field
- equals - Field must match another field (email/password confirmation)
- different - Field must be different than another field
- accepted - Checkbox or Radio must be accepted (yes, on, 1, true)
- numeric - Must be numeric
- integer - Must be integer number
- boolean - Must be boolean
- array - Must be array
- length - String must be certain length
- lengthBetween - String must be between given lengths
- lengthMin - String must be greater than given length
- lengthMax - String must be less than given length
- min - Minimum
- max - Maximum
- in - Performs in_array check on given array values
- notIn - Negation of in rule (not in array of values)
- ip - Valid IP address
- email - Valid email address
- url - Valid URL
- urlActive - Valid URL with active DNS record
- alpha - Alphabetic characters only
- alphaNum - Alphabetic and numeric characters only
- slug - URL slug characters (a-z, 0-9, -, _)
- regex - Field matches given regex pattern
- date - Field is a valid date
- dateFormat - Field is a valid date in the given format
- dateBefore - Field is a valid date and is before the given date
- dateAfter - Field is a valid date and is after the given date
- contains - Field is a string and contains the given string
- creditCard - Field is a valid credit card number
- optional - Value does not need to be included in data array. If it is however, it must pass validation.
依赖注入
Restina 内置自研的轻量级依赖注入容器 Restina\Container,基于 PHP 反射实现自动装配,不依赖第三方 DI 库。支持 set / get / has 容器操作、闭包工厂、构造函数自动装配(带实例缓存)、#[Inject] 属性注入,以及 get 与 make 双路径的循环依赖检测。
构造函数注入
class DemoController
{
    private LoggerInterface $logger;

    public function __construct(LoggerInterface $logger)
    {
        $this->logger = $logger;
    }
    ...
}
属性注入
使用 PHP 8 的 #[Inject] 属性标记需要注入的依赖:
use Restina\attribute\Inject;

class DemoController
{
    #[Inject]
    private \Restina\Db $db;

    // 可以指定绑定 ID
    #[Inject(id: 'UserService')]
    private $userService;
}
API 文档生成
Restina 内置了基于属性的 API 文档生成系统。框架从控制器注解中自动提取接口信息,生成结构化的文档数据,无需额外的 Annotation。
文档属性一览
| 属性 | 作用范围 | 用途 |
|---|---|---|
#[Docs] |
类级别 | 控制器分组(标题、描述、分类) |
#[Api] |
方法级别 | 接口元信息(标题、描述、响应示例、标签) |
#[Params] |
方法级别 | 请求参数声明 |
#[Headers] |
方法级别 | 请求头声明 |
#[Returns] |
方法级别 | 响应字段声明(支持动态字段和嵌套子字段) |
使用示例
use Restina\attribute\Docs;
use Restina\attribute\Route;
use Restina\attribute\Api;
use Restina\attribute\Params;
use Restina\attribute\Headers;
use Restina\attribute\Returns;
use Restina\attribute\enum\FieldType;

#[Docs(title: '用户管理', description: '用户增删改查接口', category: 'user')]
class UserController
{
    #[Route(methods: ['GET'], path: '/users/{id}', code: 'user.show')]
    #[Api(title: '获取用户详情', description: '根据 ID 返回用户信息', tags: ['用户'])]
    #[Headers(field: 'X-Request-Id', title: '请求ID', type: 'string', required: false)]
    #[Params(field: 'id', title: '用户ID', type: FieldType::INTEGER, rules: 'required|integer')]
    #[Returns(field: 'code', title: '状态码', type: 'integer')]
    #[Returns(field: 'data', title: '用户信息', type: 'object', children: [
        ['field' => 'id', 'title' => '用户ID', 'type' => 'integer'],
        ['field' => 'name', 'title' => '用户名', 'type' => 'string'],
        ['field' => 'email', 'title' => '邮箱', 'type' => 'string'],
    ])]
    public function show(int $id): array
    {
        // ...
    }
}
生成文档数据
调用 Attribute::generate() 方法即可获取结构化的文档数组:
$attribute = $app->attribute;
$documentation = $attribute->generate();

// 输出结构:
// [
//     [
//         'class' => 'App\Controllers\UserController',
//         'title' => '用户管理',
//         'description' => '用户增删改查接口',
//         'category' => 'user',
//         'endpoints' => [
//             [
//                 'route' => [...],   // HTTP 方法、路径、JWT 等
//                 'api' => [...],     // 标题、描述、标签等
//                 'params' => [...],  // 参数列表(含校验规则映射)
//                 'headers' => [...], // 请求头列表
//                 'returns' => [...]  // 响应字段列表
//             ]
//         ]
//     ]
// ]
注意:
generate()方法要求方法上同时标注#[Route]和#[Api]才会被提取为文档端点。仅有#[Route]而没有#[Api]的方法不会出现在文档中。
校验规则到文档的自动映射
#[Params] 中的校验规则会自动映射为文档字段约束:
| 校验规则 | 文档字段 |
|---|---|
required |
required: true |
integer / boolean / array |
type 自动转换 |
min:N / max:N |
minimum / maximum |
lengthMin:N / lengthMax:N |
minLength / maxLength |
lengthBetween:N,M |
minLength + maxLength |
in:a,b,c |
enum: [a, b, c] |
email |
format: 'email' |
url |
format: 'uri' |
ip |
format: 'ipv4' |
regex:pattern |
pattern |
对于无法直接映射的规则(如 contains、dateBefore 等),会自动追加到参数的 description 中作为说明。
自定义文档端点
框架没有内置文档访问路由,你可以根据需要自行暴露:
#[Route(methods: ['GET'], path: '/docs/api', jwt: false, permission: false)]
public function apiDocs(): array
{
    return $this->attribute->generate();
}
错误处理
Restina 提供了完善的错误处理机制:
// 在配置文件中启用调试模式
'app' => [
    'debug' => true,  // 开发环境设为true,生产环境设为false
],
框架会自动捕获异常并记录到日志中。
队列功能
配置队列连接
在应用配置文件 app/config.php 中添加队列配置:
'queue' => [
    'default' => 'redis',
    'connections' => [
        'redis' => [
            'driver' => 'redis',
            'connection' => 'default',
            'queue' => 'default',
            'retry_after' => 90,
            'block_for' => null,
        ],
        'database' => [
            'driver' => 'database',
            'table' => 'queue_jobs',
            'failed_table' => 'queue_failed_jobs',
            'retry_after' => 90,
            'after_commit' => false
        ],
        'sync' => [
            'driver' => 'sync',  // 同步队列,用于开发环境
        ],
    ],
],
创建队列任务
创建队列任务类需要继承框架提供的基础任务类:
分发队列任务
通过依赖注入获取 Queue 实例,然后分发任务:
use App\Jobs\SendEmailJob;
use Restina\Queue;
use Restina\attribute\Inject;

class OrderController
{
    #[Inject]
    private Queue $queue;

    public function sendNotification(): void
    {
        // 立即分发任务到队列
        $this->queue->push(new SendEmailJob(['to' => '[email protected]']));

        // 延迟 60 秒执行
        $this->queue->later(60, new SendEmailJob(['to' => '[email protected]']));
    }
}
启动队列处理器
在命令行中启动队列消费者:
或者使用队列工作进程命令:
更多选项:
--queue=high,default:指定多个队列--max-jobs=1000:最大处理任务数--memory=256:内存限制(MB)--sleep=3:空闲时休眠秒数--daemon:守护进程模式
定时任务(Scheduler)
Restina 提供基于 PHP 8 属性的声明式定时任务系统。
方式一:使用属性标记
在控制器或任意类中定义方法,使用 #[Scheduler] 属性标注:
use Restina\attribute\Scheduler;

class CleanupTask
{
    #[Scheduler(cron: '0 2 * * *', name: 'cleanup.logs', desc: '每天凌昨2点清理日志')]
    public function cleanupLogs(): void
    {
        // 清理逻辑
    }

    #[Scheduler(cron: '0 0 * * 0', name: 'weekly.report', desc: '每周报告')]
    public function generateWeeklyReport(): void
    {
        // 生成报告逻辑
    }
}
方式二:配置文件
在 app/scheduler.php 中以数组形式声明定时任务:
队列与定时任务结合使用
use Restina\Queue;
use Restina\attribute\Inject;
use Restina\attribute\Scheduler;

class BatchProcessor
{
    #[Inject]
    private Queue $queue;

    #[Scheduler(cron: '*/5 * * * *', name: 'process.items', desc: '每5分钟处理待处理项')]
    public function processPendingItems(): void
    {
        // 查询待处理的数据
        $pendingItems = Db::table('items')->where('status', 'pending')->get();

        foreach ($pendingItems as $item) {
            $this->queue->push(new ProcessItemJob($item));
        }
    }
}
命令行系统
Restina 提供简洁的命令行系统,所有自定义命令放在 app/commands/ 目录下。
创建命令
创建命令类需要继承 Restina\console\Command 基类:
命令使用
# 查看所有可用命令
php restina list

# 执行命令
php restina migrate

# 带选项执行
php restina migrate --force --seed

# 查看帮助
php restina help migrate
命令基类方法
Command 基类提供以下常用方法:
argument(string $name):获取参数值option(string $name):获取选项值hasOption(string $name):检查是否存在某个选项info(string $message):输出信息(青色)success(string $message):输出成功信息(绿色)warning(string $message):输出警告信息(黄色)error(string $message):输出错误信息(红色)output(string $message):普通输出
完整 API 示例
以下示例展示一个完整的用户管理控制器,涵盖属性路由、参数绑定、依赖注入和参数校验:
参与开发
请参阅 Restina核心框架包。
版权信息
Restina遵循Apache2开源协议发布,并提供免费使用。
本项目包含的第三方源码和二进制文件之版权信息另行标注。
版权所有Copyright © 2006-2026 by ivup.cn (http://ivup.cn)
All rights reserved。
Restina® 商标和著作权所有者为ivup.cn。
更多细节参阅 LICENSE
All versions of restina with dependencies

nyholm/psr7 Version ^1.8
psr/log Version ^3.0.0
psr/http-message Version ^2.0
illuminate/database Version ^12.49
illuminate/events Version ^12.49
firebase/php-jwt Version ^7.0