Download the popular PHP framework Symfony without Composer
Normally it is possible to download a PHP framework like Symfony with Composer. But sometimes Composer is not available on the webspace or there are other reasons why you prefer to download the Symfony framework directly.
On this page I show you step by step how to download a PHP framework, in our case the framework Symfony without Composer.
First you have to visit the page where you can download the Symfony framework https://php-download.com/package/symfony/skeleton. It is important that you select create-project.

create-project means you want to develop on top of this Composer project. When you are selecting require the package will be downloaded in a vendor folder, and you can include the package in your existing project. But now we want to start a new project which should be based on Symfony, and we want to start developing on top of the package Symfony.
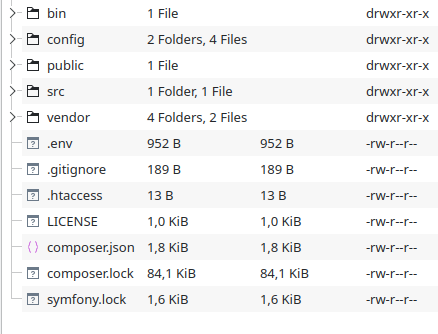
After pressing on the download button you will get a ZIP file with the following content.
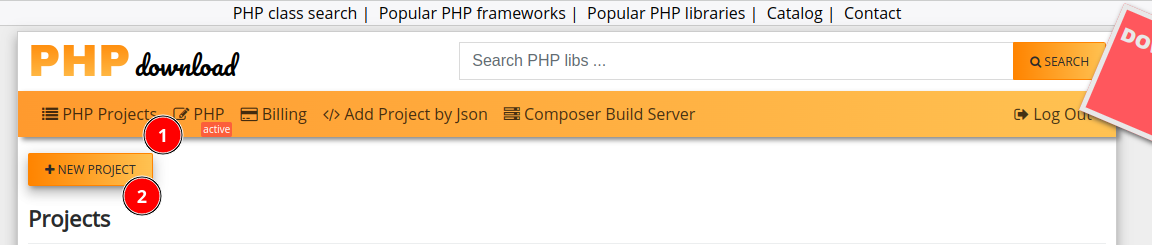
When you are planning to build a microservice, console application or API you are finish. But when you want to build a traditional web application, we need to add another composer package. To add this further package it is necessary to create a project on php-download.com. The project should be active, so we can add further packages to it.
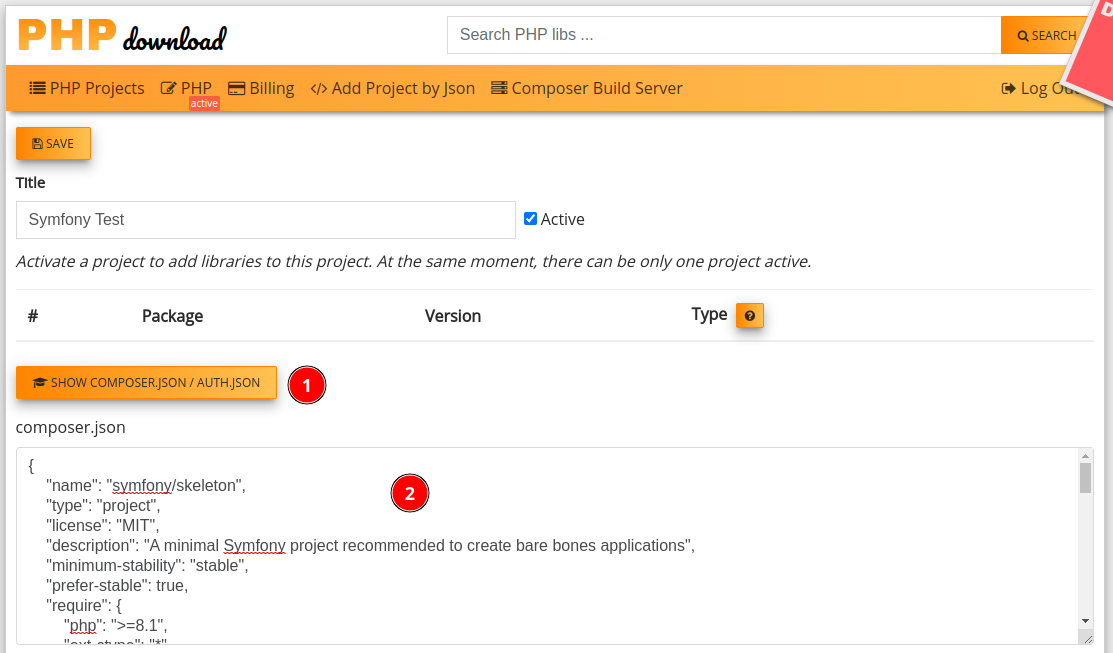
After we have created the project, we go into the edit view of the project and there we are adding the content of the composer.json file, which we find in the root folder of the downloaded Symfony ZIP file.
    {
    "name": "symfony/skeleton",
    "type": "project",
    "license": "MIT",
    "description": "A minimal Symfony project recommended to create bare bones applications",
    "minimum-stability": "stable",
    "prefer-stable": true,
    "require": {
        "php": ">=8.1",
        "ext-ctype": "*",
        "ext-iconv": "*",
        "symfony/console": "6.1.*",
        "symfony/dotenv": "6.1.*",
        "symfony/flex": "^2",
        "symfony/framework-bundle": "6.1.*",
        "symfony/runtime": "6.1.*",
        "symfony/yaml": "6.1.*"
    },
    "require-dev": {
    },
    ...
    }
This content we are inserting into the corresponding textarea.
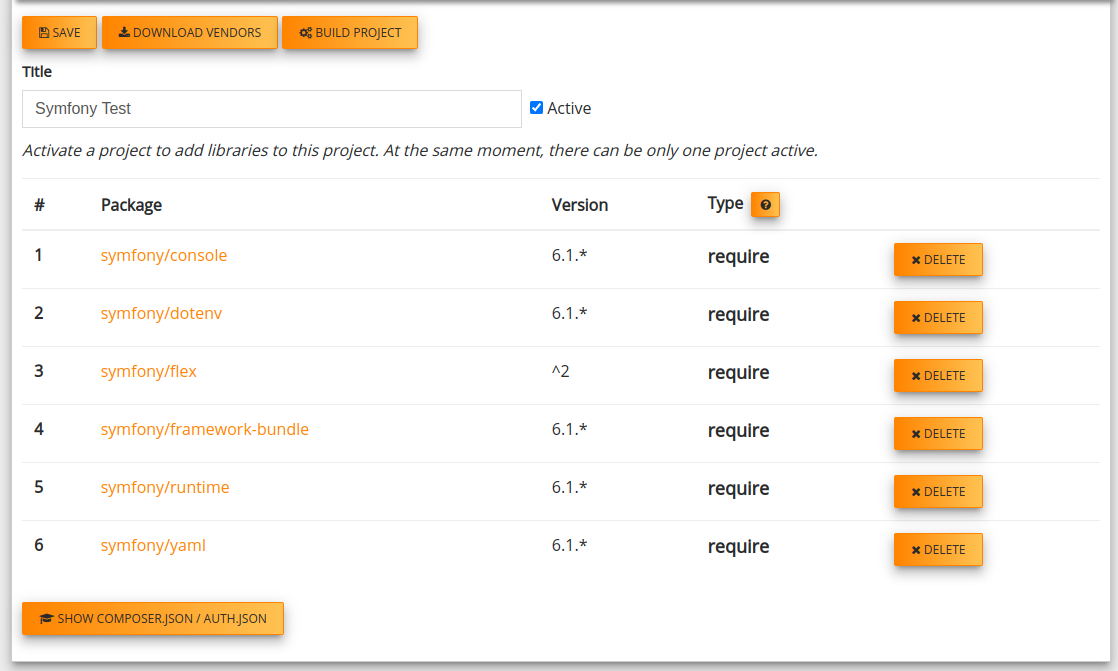
After clicking on save, we will see all the required packages.
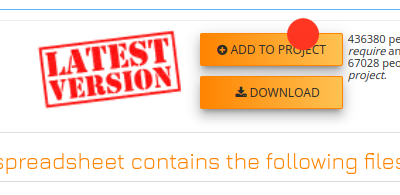
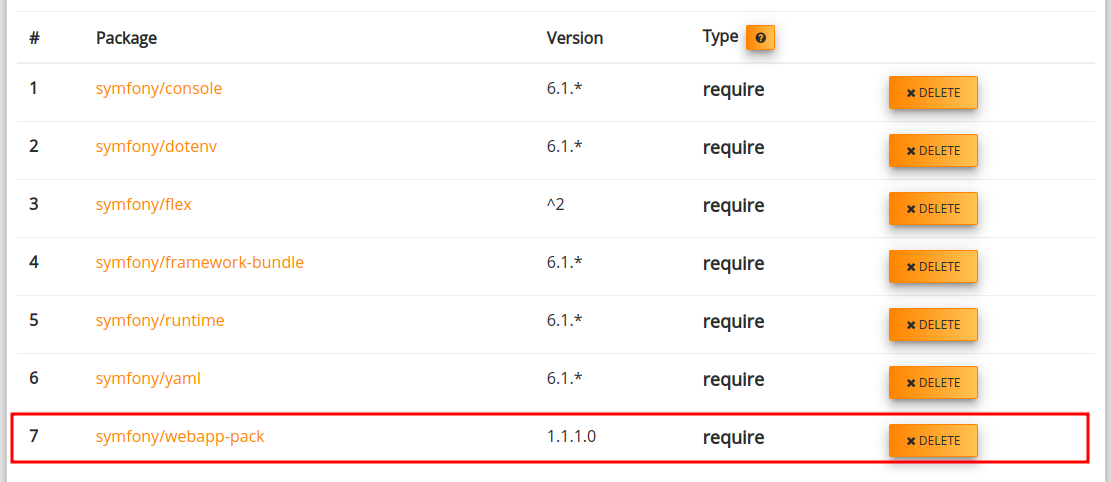
In the end we are opening the URL from the additional needed webapp package (https://php-download.com/package/symfony/webapp-pack). There we are clicking on Add to project.
If you have not forgotten to make the project active, the package is now part of your Symfony project.
Now we are going back to our project detail view, and we are clicking on Download Vendors to download our new vendor folder. The last step to get a fully functional Symfony installation is to overwrite the old vendor folder with the newly downloaded. Don’t delete the old vendor folder. This will normally work, but Symfony is generating a so-called autoload_runtime.php which will be lost then.