Download the PHP package sergiocomeron/moodle-mod_jitsi without Composer
On this page you can find all versions of the php package sergiocomeron/moodle-mod_jitsi. It is possible to download/install these versions without Composer. Possible dependencies are resolved automatically.
Download sergiocomeron/moodle-mod_jitsi
More information about sergiocomeron/moodle-mod_jitsi
Files in sergiocomeron/moodle-mod_jitsi
Package moodle-mod_jitsi
Short Description Jitsi Meet videoconferencing activity module for Moodle: scheduled sessions, attendance, recordings (GCS/YouTube/Dropbox/JaaS) and AI features.
License GPL-3.0-or-later
FAQ
Example:
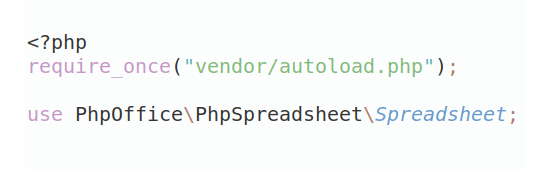
In general, it is recommended to use always a project to download your libraries. In an application normally there is more than one library needed.
- Some hosting areas are not accessible by a terminal or SSH. Then it is not possible to use Composer.
- To use Composer is sometimes complicated. Especially for beginners.
- Composer needs much resources. Sometimes they are not available on a simple webspace.
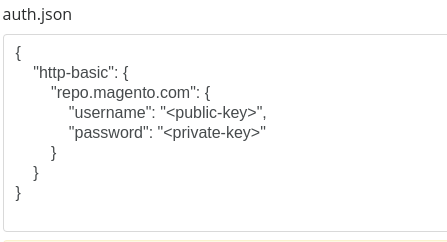
- If you are using private repositories you don't need to share your credentials. You can set up everything on our site and then you provide a simple download link to your team member.
- Simplify your Composer build process. Use our own command line tool to download the vendor folder as binary. This makes your build process faster and you don't need to expose your credentials for private repositories.
Informations about the package moodle-mod_jitsi
Jitsi Meet Moodle Plugin


Documentation — tutorials, configuration guides, and reference for all features.
Table of contents
- Installation
- mod_jitsi Account
- Permissions
- Recording configuration
- Dropbox and external recording links
- Private Sessions
- Token based mode
- Recommendations when using public Jitsi servers
- Using a Jitsi as a Service Account
- Google Cloud Platform (GCP) Integration - BETA
- AI Features for Recordings
- Attendance Report
- Session Usage Statistics
- Support and security
- Disclaimer
- License
mod_jitsi integrates Jitsi Meet videoconferencing into Moodle. To use it in production you need a Jitsi server — the plugin supports three options:
- GCP auto-managed — the plugin provisions and manages a complete Jitsi server (including Jibri recording and AI features) in Google Cloud Platform automatically. A Google Cloud account with billing enabled is all you need — no manual server setup required. The simplest way to get a fully-featured setup.
- JaaS (8x8) — hosted service, free up to 25 monthly active users. No infrastructure required. More information at https://jaas.8x8.vc/
- Self-hosted — your own Jitsi Meet server with full control and JWT authentication.
The public server at meet.jit.si can be used for quick testing but restricts sessions to 5 minutes and is not suitable for production.
More information about Jitsi Meet at https://jitsi.org/
Features available in the plugin:
- Schedule webconferences in your course
- Activity completion tracking (conditions related with time attendance)
- Unlimited participants (limits are imposed mainly by bandwidth in your Jitsi servers)
- Moodle profile pictures used as avatar in webconference
- Guest URLs for users in other courses or outside Moodle
- Private 1-on-1 sessions — call any coursemate directly from their Moodle profile, with call history and instant notification
- HD Audio/Video
- Multiple participants can share their screen simultaneously
- Tile view, break-out rooms, chat, polls, virtual backgrounds
- YouTube video sharing — pause, rewind and comment videos with all your students
- Full moderation control to silence or remove students (token-based mode recommended — see below)
- YouTube streaming and automatic recordings publishing in your course (requires streaming configuration — see below)
- Dropbox recording with automatic or manual link publishing in the recordings tab
- JaaS (8x8) cloud recordings automatically captured and available for download, expiring after 24 hours
- One-click record button in the Moodle toolbar for GCP and (optionally) 8x8 servers, with an extra "Record to Dropbox" button when Dropbox credentials are configured
- AI summary, quiz and transcription of recordings via Google Vertex AI (Gemini) — for GCS recordings and cloud recording links (8x8/JaaS, Dropbox)
- Attendance report — detailed per-activity report with time-on-session per student, recording view tracking and access log (requires mod_jitsi Account)
- Recording view tracking — progress bars showing exactly which parts of each video each student has watched, persisted between sessions (requires mod_jitsi Account)
- Viewing heatmap — aggregate bar showing which parts of each recording were watched by what fraction of students, with a second bar tracking replays. Hover to see the viewer list per segment (requires mod_jitsi Account)
- Course overview — aggregated dashboard for all Jitsi activities in a course: session stats, student engagement ranking and top recordings by viewers (requires mod_jitsi Account)
- Session usage statistics — site-wide aggregated stats (sessions, participants, recordings) with daily breakdown (requires mod_jitsi Account)
Installation
Requires Moodle 4.5 or later.
Install from the Moodle Marketplace: download the ZIP and install it from Site administration → Plugins → Install plugins, or unzip it into mod/jitsi.
Alternatively, clone the repository into your Moodle directory:
Composer-managed Moodle sites (Moodle 5.2 or later) can install the plugin from Packagist:
After adding the code, visit Site administration → Notifications to complete the installation.
mod_jitsi Account
Some features require registering your Moodle installation at the mod_jitsi Account portal (portal.sergiocomeron.com). Registration is free and takes less than a minute.
A note on open source transparency: since mod_jitsi is open source, anyone can modify the code and bypass the registration requirement — we know that. Registration is not about locking features for commercial reasons. It exists purely so the developer can see which Moodle versions, server types and features are actually used, and focus development where it matters most.
Features that require registration
| Feature | Description |
|---|---|
| Attendance report | Three-tab report: live session attendance with dates, recording views with heatmap, and course overview |
| Recording view tracking | Progress bars showing which parts of each video each student has watched, persisted between sessions |
| Viewing heatmap | Aggregate heatmap per recording showing viewer fraction and replay counts per time segment, with hover tooltip listing which students watched each part |
| Course overview | Aggregated view of all Jitsi activities in the course: sessions, participants, top recordings and student engagement ranking |
| Session usage statistics | Site-wide aggregated stats with daily breakdown |
How to register
- Go to Site administration > Plugins > Activity modules > Jitsi
- In the mod_jitsi Account section at the top, click Register & enable
- Enter your email address and submit the form
- Check your email and complete registration at the portal
- Return to the settings page — it will automatically detect your registration and activate the features
What data is collected
When you register, the following information is stored:
- Your email address
- Your Moodle site name and URL
- An anonymous hash of your site URL (for telemetry)
Once registered, a weekly anonymous ping is automatically sent containing: server type, Moodle version, plugin version, activity count, and which optional features are enabled. No user data, course data or session content is ever sent.
See the Privacy Policy for full details.
Permissions
These are the permissions populated by default with the plugin. Most of them are available at the activity level so teachers can override some default restrictions.
- Add a new Jitsi (mod/jitsi:addinstance): allow to create Jitsi activities.
- View and copy invite links for guest users (mod/jitsi:createlink): a teacher could allow students to share the invitation links for guest users.
- Delete record (mod/jitsi:deleterecord): allow to mark a recording as deleted. The recording will be set as private in YouTube. Recordings marked as deleted will be deleted in YouTube with the scheduled task (\mod_jitsi\task\cron_task_delete) or by the admin from a list. You may want to prevent non-editing teachers from deleting recordings.
- Edit record name (mod/jitsi:editrecordname): allow to rename the title in a recording. You may want to prevent non-editing teachers from renaming recordings.
- Hide recordings (mod/jitsi:hide): allow to hide recordings. You may want to prevent non-editing teachers from hiding recordings.
- Jitsi Moderation (mod/jitsi:moderation): determines who is moderator in sessions. When "Token configuration" is set, only users with this capability are promoted as Jitsi moderators and a moderator indicator is displayed next to their name. When "Token configuration" is missing, some buttons and features like "mute-everyone" or "kick off participant" are hidden to non-moderator users, but experienced users may be able to bypass these restrictions.
- Record session (mod/jitsi:record): allow to start recordings. You could create Jitsi Sessions where students could record themselves.
- View Jitsi (mod/jitsi:view): set the users who can see and access Jitsi activities in the course view.
- View recordings (mod/jitsi:viewrecords): allows access to the Recordings tab. Disable this to hide recordings from specific roles.
- Generate AI summary (mod/jitsi:generateaisummary): allows generating AI-powered summaries for supported recordings (GCS and cloud recording links). Requires AI features to be enabled.
- Generate AI quiz (mod/jitsi:generateaiquiz): allows generating AI-powered quizzes from supported recordings (GCS and cloud recording links). Requires AI features to be enabled.
- Generate AI transcription (mod/jitsi:generateaitranscription): allows generating AI transcriptions for supported recordings (GCS and cloud recording links). Requires AI features to be enabled.
- Access to the attendance report (mod/jitsi:viewattendance): allows teachers to access the detailed attendance report with recording view tracking. Requires mod_jitsi Account.
Recording configuration
The plugin supports several recording methods. Choose the one that best fits your infrastructure.
GCP auto-managed with Jibri (recommended)
The most integrated recording option. When using a GCP auto-managed server (Type 3), the plugin automatically provisions a dedicated Jibri recording VM alongside the Jitsi server. Recordings are saved directly to Google Cloud Storage (GCS) and published automatically in the activity's Recordings tab — no YouTube account or manual intervention required.
This method also unlocks AI features (summary, quiz, transcription) powered by Google Vertex AI (Gemini), since recordings are stored in GCS.
To use this method, set up a GCP auto-managed server (see the GCP section below). Recording and AI features are enabled automatically once Jibri is provisioned.
YouTube Moodle-integrated
Configure the plugin to record sessions to corporate YouTube accounts. Teachers just need to click the Record and Streaming switch — recordings are automatically published as unlisted videos and embedded in the activity's Recordings tab. One Jitsi activity can have many recordings.
Recordings are stored as unlisted videos in YouTube. Teachers can hide or delete recordings from the activity; only administrators can permanently delete them from YouTube. A scheduled task handles automatic deletion based on a configurable retention period.
This method uses YouTube v3 APIs to:
- create live streaming sessions on the fly
- embed recordings inside Moodle
- delete recordings when no longer needed
Note: recordings remain unlisted on YouTube but there is no way to prevent students from sharing the URL externally. Teachers should be aware of this.
Multiple YouTube accounts can be configured — only one is active at a time, but having extras available is useful if YouTube restricts a specific account.
Set up your OAuth 2.0 Client ID in Google Cloud
- Prepare one or more YouTube accounts with live streaming enabled (requires phone verification and a 24-hour wait)
- Create a project in Google Cloud Console and enable the YouTube Data API v3
- Create OAuth 2.0 credentials for a Web application, adding the redirect URI shown in the Jitsi plugin settings (e.g.
https://your_moodle_domain/mod/jitsi/auth.php) - In the OAuth consent screen, add the Google accounts associated with your YouTube channels as authorised users. Google calls these "Test users" — despite the name, this is the correct setup for production use when you only need a limited set of known accounts. You do not need to publish the app publicly.
- Copy the Client ID and Client Secret to the Jitsi plugin settings in Moodle
- In Moodle, add and authorise your Streaming/Recording Accounts
- Enable Live stream and select Moodle Integrated as the Live Streaming Method
Note on app status: Google's "Testing" status means only the accounts you explicitly added can authorise the app, and tokens expire every 7 days — requiring periodic re-authorisation in Moodle. To avoid token expiry, either publish the app (Google may require verification depending on scopes) or use the Google Workspace internal mode described below.
Google Workspace users: set the "User type" in the OAuth consent screen to INTERNAL — no authorised users need to be added and tokens never expire. This is the recommended setup if your institution uses Google Workspace.
Important: never delete the OAuth credentials in Google Cloud — doing so will remove all recordings from the associated YouTube accounts.
YouTube manual (teacher's own account)
Teachers can also stream using their own personal YouTube accounts by creating a "Go Live" stream and copying the stream key into the Jitsi interface. The recording link must then be published manually. This requires no plugin configuration but each teacher needs their own YouTube account with live streaming enabled.
Dropbox and external recording links
In addition to YouTube streaming, the plugin supports publishing recordings stored in Dropbox or retrieved directly from the JaaS (8x8) cloud recording system.
How recording links are captured
When a session ends, the plugin listens to two Jitsi events:
recordingLinkAvailable— fired by Jitsi when a recording link is ready (Dropbox or other).recordingStatusChanged— fired when recording stops, may include a direct URL.
Links are saved automatically in the activity's Recordings tab. Duplicate links for the same session are ignored.
JaaS (8x8) cloud recordings
When using a JaaS server with cloud recording enabled, recordings appear automatically in the Recordings tab with a Download button. These links are hosted on 8x8's CDN and expire after 24 hours (or according to your JaaS plan). Once expired, they are automatically hidden from the tab — no manual cleanup is needed.
Recording button location (8x8)
The Recording button (8x8/JaaS) setting picks where teachers start a recording:
- Jitsi interface (default): Jitsi's native recording button stays inside the meeting. Its dialog lets the user choose between the 8x8 recording service and their own Dropbox.
- Moodle integrated: the native button is removed and a one-click Record button appears in the Moodle toolbar above the meeting (same UX as GCP servers). It always records to the 8x8 recording service and the link is saved in the activity automatically. If the Dropbox app credentials are configured, a separate Dropbox button is also shown: it runs the Dropbox OAuth flow in a popup and records straight to the teacher's Dropbox (that recording must then be published manually, see below).
Dropbox recordings
If Dropbox is configured in the plugin settings (App Key and Redirect URI), teachers can record sessions directly to their Dropbox account. Once the recording is saved to Dropbox, the teacher must manually publish the link to students:
- After the session, the teacher gets the share link from their Dropbox account.
- In the activity's Recordings tab, the teacher pastes the link using the "Add recording link" form.
When using Dropbox recording, Jitsi fires
recordingStatusChangedwhen the recording stops, but the Dropbox URL is not included — it is generated asynchronously by Dropbox after the upload completes. This is why Dropbox links cannot be captured automatically and must be published manually.
Dropbox configuration
Navigate to Site administration > Plugins > Activity modules > Jitsi and fill in the Dropbox recording configuration section:
- Dropbox App Key: the App Key from your Dropbox app (Dropbox Developer Console → your app → Settings tab).
- Dropbox Redirect URI: the OAuth2 redirect URI registered in your Dropbox app. Must match exactly what you set in the Dropbox App Console — usually
https://your-jitsi-domain/static/oauth.html.
You need to create a Dropbox app at the Dropbox App Console.
8x8 servers: to use the Record to Dropbox button in the Moodle toolbar (recording button setting "Moodle integrated"), register this additional redirect URI in your Dropbox app:
https://your-moodle/mod/jitsi/dropboxoauth.php. The token obtained in the popup lives only in the browser session; it is never stored server-side.
Embedding Dropbox videos
When adding a Dropbox link manually, teachers can choose to embed the video directly in the Recordings tab by checking the "Embed video (Dropbox)" option. The plugin transforms the Dropbox share URL to a direct streaming URL (?raw=1) and renders it with an HTML5 <video> player. A fallback "Open recording" link is always shown below the player.
Note: Dropbox has a monthly bandwidth limit on free accounts. If many students view the embedded video simultaneously, Dropbox may temporarily block direct access.
Managing recording links
Teachers with the Record session (mod/jitsi:record) capability can:
- Add external recording links manually via the form at the bottom of the Recordings tab.
- Edit any manually-added link (URL, name, embed option) using the edit icon next to the recording.
- Hide/show recordings from students.
- Delete recordings from the activity (external links are only removed from Moodle; the actual file in Dropbox or 8x8 is not affected).
The Recordings tab is always visible to teachers even when no recordings exist yet, so they can add links at any time.
Recording link expiry
The timeexpires field in the database controls when a recording link is automatically hidden:
| Source | Expiry |
|---|---|
| JaaS (8x8.vc) | 24 hours from creation (or TTL from event if available) |
| Dropbox | Never (permanent) |
| YouTube | Never (managed via YouTube API) |
| Manual entry | Never (permanent) |
Expired recordings are hidden from the tab but not deleted from the database. They can be deleted manually from the Recordings tab.
Private Sessions
When Private sessions is enabled in the plugin settings, any user can start a private 1-on-1 video call with a coursemate — without needing a scheduled Jitsi activity.
How it works
- Own profile page: a "Call someone" link appears that opens the private session hub (
call.php), where you can search for coursemates and view your call history. - Other user's profile page: a "Start private session" link appears, but only if you share at least one course with that user. Clicking it launches a private session immediately.
- Call history: the hub shows your most recent call per contact, ordered by time, with avatars and names. Clicking any entry re-opens the session with that person.
- Instant notification: when you enter a private session, Moodle sends a popup notification to the other participant so they know to join.
Room naming
Private rooms always use the same symmetric name regardless of who initiates: {siteshortname}-priv-{minUserId}-{maxUserId}. This means if user A calls user B and later user B calls user A, they both land in the same room.
Restrictions
- Both participants are automatically moderators.
- Recording and live streaming are always disabled in private sessions — there is no course activity associated with the call.
- The search only returns users who share at least one course with you (no calling strangers).
Enabling private sessions
Go to Site administration > Plugins > Activity modules > Jitsi and enable the Private sessions setting.
Token based mode
If you decide to deploy this plugin in production you may would like to install your private Jitsi Meet server with "Token based" mode. This configuration will give you extra control with the moderation privileges.
Jitsi Meet deployment servers can be complex and is beyond the scope of this article. You could explore buying Jitsi Meet as a service with some provider (ie: https://jaas.8x8.vc) with an important discount for Moodle users (read more below).
Many Governmental Education Institutions deploy their own Jitsi servers to be used by their schools or universities... you could ask them if they provide Jitsi token credentials for this configuration.
The token configuration sends users with the mod/jitsi:moderation capability as moderators in a Jitsi session — only they are allowed to mute participants, disable cameras or remove participants.
Required plugin for JWT moderation on self-hosted servers
If you are using a self-hosted Jitsi server with JWT authentication (Type 1), you need to install the jitsi-token-moderation-plugin on your Jitsi server for moderator roles to work correctly.
Without this plugin, the moderator field in the JWT token is ignored by Jitsi and all users will join as moderators, regardless of their Moodle role.
This plugin is not required for 8x8 JaaS (Type 2) or GCP auto-managed (Type 3) servers, as moderation is handled natively by those services.
Recommendations when using public Jitsi servers
The plugin connects by default with the public server at meet.jit.si. There are many other public Jitsi Meet servers — search Google or look at the Community-run instances list. Testing alternative servers is a good idea in case of service disruption or to find one closer to your users.
Bear in mind that meet.jit.si restricts embed mode to 5 minutes per conference. For production use, you need a GCP auto-managed server provisioned by this plugin, a JaaS (8x8) account (free up to 25 monthly active users — pricing), or a self-hosted Jitsi server. 8x8 is the company behind the Jitsi project and using their service is one way to support its future.
Using a Jitsi as a Service Account
You need to create a Jitsi as a Service Account, if you don't already have one.
Once you do, go to the API Keys page and create a new key pair, name it something meaningful. Download the private key and store it somewhere safe.
Open the Moodle Jitsi plugin settings and change the values as follows.
- Domain:
8x8.vc - Server type: pick
8x8 Servers - App_ID: copy it from the JaaS Console API Keys page, i.e.
vpaas-magic-cookie-xxxxx - Api Key ID: copy it from the keys table in the same page, it should be something like
vpaas-magic-cookie-xxxxx/somehex - Private key: the contents of the private key you just downloaded from JaaS Console
Save the changes and you're ready to use Jitsi as a Service in your Moodle courses.
Google Cloud Platform (GCP) Integration - BETA
This plugin includes experimental support for automatically creating and managing Jitsi Meet servers in Google Cloud Platform. This feature allows you to:
- Create Jitsi servers on-demand directly from Moodle
- Automatically configure Jitsi Meet with JWT authentication
- Manage server lifecycle (start/stop instances)
- Use static IP addresses for consistent DNS configuration
- Automatic Let's Encrypt SSL certificate provisioning
⚠️ This feature is in BETA testing. Use it in production environments with caution.
Prerequisites
Before using the GCP integration, you need:
-
Google Cloud Platform Account
- Active GCP project with billing enabled
- Compute Engine API enabled
-
Service Account with Permissions
- Create a service account in your GCP project
- Grant the following roles:
Compute Admin(roles/compute.admin) - to create and manage instancesService Account User(roles/iam.serviceAccountUser) - to attach service accounts to instances
- Download the JSON key file for this service account
- Domain Name (Required)
- A fully qualified domain name (FQDN) that you can point to the VM's IP address
- Required for JWT authentication configuration and Let's Encrypt SSL certificates
- Example:
jitsi.example.com
Configuration Steps
1. Enable Compute Engine API
In your Google Cloud Console:
- Go to APIs & Services > Library
- Search for "Compute Engine API"
- Click "Enable"
2. Create a Service Account
- Go to IAM & Admin > Service Accounts
- Click "Create Service Account"
- Name it (e.g., "jitsi-moodle-manager")
- Grant roles:
Compute AdminService Account User
- Click "Create Key" and download the JSON file
- Keep this file secure - it provides full access to your Compute Engine resources
3. Configure the Plugin in Moodle
Navigate to Site administration > Plugins > Activity modules > Jitsi > Google Cloud (GCP) - BETA section:
-
Project ID: Your GCP project ID (e.g.,
my-project-12345)- Find it in GCP Console dashboard
-
Zone: The Compute Engine zone where VMs will be created (e.g.,
europe-west1-b)- Choose a zone close to your users for better performance
- List of zones: https://cloud.google.com/compute/docs/regions-zones
-
Machine Type: VM size (default:
e2-standard-4)e2-standard-2: 2 vCPUs, 8GB RAM - suitable for small meetings (<20 participants)e2-standard-4: 4 vCPUs, 16GB RAM - recommended for medium meetings (<50 participants)e2-standard-8: 8 vCPUs, 32GB RAM - for large meetings (>50 participants)- Pricing: https://cloud.google.com/compute/vm-instance-pricing
-
Base Image: OS image for the VM (default:
projects/debian-cloud/global/images/family/debian-12)- The default Debian 12 image is recommended
- Do not change unless you have a custom image with Jitsi pre-installed
-
Network: VPC network (default:
global/networks/default)- Use
global/networks/defaultunless you have a custom VPC setup - Format:
global/networks/<network-name>orprojects/<project>/global/networks/<network-name>
- Use
-
Hostname (FQDN) - Required: The fully qualified domain name for your Jitsi server (e.g.,
jitsi.example.com)- Mandatory: Required for JWT authentication and SSL configuration
- You must configure DNS to point this domain to the VM's IP address (shown during creation)
- The plugin will reserve a static IP address for consistency
- Also create an A record for
auth.<your-hostname>pointing to the same IP
-
Let's Encrypt Email - Required: Email address for Let's Encrypt notifications (e.g.,
[email protected])- Used for SSL certificate requests and expiration notices
- Service Account JSON: Upload the JSON key file you downloaded in step 2
4. Configure Firewall Rules (Automatic)
The plugin will automatically create a firewall rule named mod-jitsi-allow-web with the following configuration:
- Ports:
- TCP 80 (HTTP)
- TCP 443 (HTTPS)
- UDP 10000 (Jitsi video bridge)
- Target: Instances tagged with
mod-jitsi-web - Source:
0.0.0.0/0(all internet traffic)
If the plugin lacks permissions to create firewall rules automatically, you'll need to create this rule manually in the GCP Console.
Creating a Jitsi Server
Once configuration is complete:
- Go to Site administration > Plugins > Activity modules > Jitsi > Server management
- Click the "Create server in Google Cloud" button
-
The plugin will:
- Reserve or reuse an available static IP address
- Create a Compute Engine VM with the specified configuration
- Install and configure Jitsi Meet automatically
- Configure JWT authentication with auto-generated credentials
- Wait for DNS propagation and obtain a Let's Encrypt SSL certificate
- Register the server in Moodle's server list
-
Monitor the creation process:
- A modal will show the progress
- Creation typically takes 5-10 minutes
- The startup script will wait up to 15 minutes for DNS propagation
- Configure DNS (Required):
- The modal will display the static IP address assigned to your VM
- Immediately create the following A records in your DNS provider:
jitsi.example.com→ Static IP address (main hostname)auth.jitsi.example.com→ Same static IP address (required for JWT)
- DNS settings:
- Type: A
- TTL: 300 (recommended for faster propagation)
- The VM will wait for DNS to propagate before completing installation
How It Works
The Startup Script
The plugin uses a cloud-init/bash startup script that runs on first boot:
-
DNS Waiting Phase (0-15 minutes):
- Checks if the configured hostname resolves to the VM's public IP
- Waits up to 15 minutes for DNS propagation
- Important: Without proper DNS, JWT authentication may not work correctly
-
Jitsi Installation:
- Installs Jitsi Meet from official repositories
- Configures Prosody (XMPP server) for JWT authentication using the hostname
- Generates random App ID and Secret for JWT
-
SSL Certificate:
- If DNS is properly configured → requests Let's Encrypt certificate
- If DNS is not ready → installs self-signed certificate (browsers will show warnings)
-
JWT Configuration:
- Configures Jicofo and Prosody for token-based authentication
- Only users with valid JWT tokens (generated by Moodle) can moderate sessions
- Provides enhanced security and moderation control
- Callback to Moodle:
- Once complete, the VM notifies Moodle with the JWT credentials
- Moodle automatically registers the server and makes it available for use
Static IP Address Management
- The plugin automatically reserves a static IP address for each server
- If you delete a server, the IP is released back to the pool
- When creating new servers, the plugin reuses available static IPs to avoid quota limits
- Each static IP incurs a small cost (~$0.01/hour or ~$7/month when in use)
Managing Servers
Once created, servers appear in the Server Management interface with the following options:
- Edit: Modify server name and configuration
- Start/Stop: Control the VM lifecycle to save costs
- Stopped VMs only incur storage costs (much cheaper than running VMs)
- Starting a stopped VM takes ~1-2 minutes
- Delete: Permanently remove the server
- Warning: This deletes the VM and releases the static IP
- Existing sessions using this server will no longer work
Cost Considerations
Running Jitsi servers in GCP incurs costs:
-
Compute Instance (when running):
- e2-standard-2: ~$49/month (8760 hours)
- e2-standard-4: ~$98/month
- e2-standard-8: ~$196/month
- Use "Stop" feature when not in use to save costs
-
Static IP Address:
- ~$7/month per IP when attached to a running instance
- ~$9/month per IP when reserved but not in use
- Tip: Delete unused IPs to avoid charges
-
Storage:
- ~$0.17/month per 20GB SSD (default boot disk)
- Network Egress (outbound traffic from VM):
- First 1GB/month: Free
- After 1GB: ~$0.12/GB (varies by region)
- When this matters:
- 1-to-1 calls: Minimal (peer-to-peer, doesn't use server bandwidth)
- 3+ participants: High (Jitsi Videobridge retransmits all video/audio streams)
- Estimation: A 1-hour conference with 10 participants in HD can use 5-10GB of egress
- This can be the largest cost for institutions with frequent large meetings
- Consider monitoring actual usage before scaling to many users
Cost Saving Tips:
- Stop VMs when not in active use (e.g., outside business hours)
- Delete servers you no longer need
- Consider using Preemptible VMs for testing (not recommended for production)
Security Considerations
-
JWT Authentication: All auto-created servers use JWT authentication by default
- Only Moodle can generate valid tokens
- Users cannot join or moderate without Moodle-issued credentials
-
Service Account Security:
- Keep the JSON key file secure
- Never commit it to version control
- Rotate keys periodically
- Use least-privilege: only grant necessary roles
-
Network Security:
- The firewall rule opens ports to the internet (required for Jitsi)
- Jitsi itself handles authentication via JWT
- Consider using Cloud Armor for DDoS protection in production
- SSL Certificates:
- Always use Let's Encrypt certificates in production
- Self-signed certificates will show browser warnings to users
- Certificates auto-renew via certbot
AI Features for Recordings
Recordings can be processed by Google Vertex AI (Gemini 2.5 Flash) to generate:
- AI Summary — a 3-5 paragraph educational summary of the recording
- AI Quiz — a set of true/false questions auto-created as a Moodle quiz
- AI Transcription — a timestamped transcript with chapter headings
Supported recording sources
- GCS recordings (
https://storage.googleapis.com/…) from a GCP auto-managed server with Jibri. - External recording links with a public, non-expired
https://URL — including JaaS (8x8) cloud recordings (the plugin resolves the 8x8 player page to the underlying video automatically) and Dropbox links added to the Recordings tab. - YouTube recordings are not supported: Vertex AI only ingests public YouTube videos, and the plugin uploads them as unlisted.
Note that 8x8 cloud recording links expire (24 hours by default), so AI content must be generated while the link is still valid — the generated summary/quiz/transcription is kept permanently either way.
Enabling AI features
Navigate to Site administration > Plugins > Activity modules > Jitsi > AI Features and:
- Check Enable AI features (
aienabled). This is disabled by default. - Select the Vertex AI region where recordings will be processed (default:
europe-west1).
Vertex AI requests are billed to a GCP project, resolved in this order: the GCS server owning the recording's bucket → the global GCP project plugin setting → any configured server with a project. Sites without a GCP-managed server can use AI features by filling in the global GCP project setting and uploading the service account JSON (the service account needs the Vertex AI User role and the Vertex AI API enabled in the project).
Teachers and editing teachers with the corresponding capabilities (generateaisummary, generateaiquiz, generateaitranscription) will see an AI dropdown in the Recordings tab for supported recordings. After confirming the data-protection notice, the item switches to a queued state and the tab refreshes itself automatically when the generation finishes — no page reload needed. Generation runs as an ad-hoc task, so Moodle cron must be running.
GDPR / Data Protection considerations
⚠️ Important: enabling AI features sends video recordings to Google Vertex AI for processing. Video recordings contain personal data (image and voice of participants).
Before enabling AI features, your institution must:
-
Sign a Data Processing Agreement (DPA) with Google Cloud.
Google offers a standard DPA as part of the Google Cloud Terms of Service. Accepting it in the Cloud Console satisfies GDPR Art. 28 requirements for a processor agreement. -
Configure the processing region to match your data residency requirements.
Useeurope-west1(Belgium) or another EU region to keep data within the European Economic Area. Avoidus-central1or other non-EU regions if your institution is subject to GDPR. -
Inform participants that recordings may be processed by an AI service for summarisation and transcription. Update your privacy notice accordingly.
- Review retention: AI-generated content (summaries, transcriptions, quiz questions) is stored in the Moodle database. Apply your standard data retention policy.
The plugin's privacy/provider.php declares:
- The external data location
vertexai(Google Vertex AI) and the nature of data sent (video recordings). - The
jitsi_source_recorddatabase table storing AI-generated outputs.
For a full list of data exported and deleted per user, see the Moodle Privacy API integration in classes/privacy/provider.php.
Attendance Report
The attendance report (mod/jitsi:viewattendance) provides teachers with a detailed breakdown of student participation in each Jitsi activity. It is accessible from the activity's secondary navigation and is organised into three tabs.
Tab 1 — Live sessions
Shows all-time attendance for the activity with no date filter:
- Student table — sessions entered, total minutes, average time per session and all dates attended (with exact connection times once the nightly cron has run)
- Export — download the table in CSV, Excel or other formats
Tab 2 — Recordings
Shows recording engagement for the selected date range:
- Viewing heatmap — two aggregate bars per recording: unique viewers (blue) and total replays (orange), with a 10-second bucket resolution. Hover over any blue bucket to see exactly which students watched that segment.
- Per-student progress bars — individual segment bars showing what percentage of each recording each student has watched
- Recording access log — for non-embeddable recordings (8x8, external links): a log of when each student clicked to open the recording
- Date filter — narrow the data to a specific period
Tab 3 — Course overview
Aggregated view across all Jitsi activities in the course:
- Activity overview — sessions, unique participants, total minutes and recordings per activity
- Student engagement ranking — students ranked by total session minutes, with recording starts
- Top recordings — recordings with the most unique viewers across the course
Requirements
- The
mod/jitsi:viewattendancecapability (granted to teachers by default) - A registered mod_jitsi Account
- The
aggregate_usage_statsscheduled task must have run at least once for the live sessions data to be available (data is pre-computed nightly)
Session Usage Statistics
The session usage statistics page (/mod/jitsi/sessionusagestats.php) provides site administrators with an aggregated view of Jitsi usage across the entire Moodle site.
Stats are pre-computed nightly by the aggregate_usage_stats scheduled task and include daily breakdowns of sessions, unique participants, total minutes and recordings. A live report can also be generated directly from the activity log.
Requires a registered mod_jitsi Account.
Support and security
- Bug reports and questions: use GitHub Issues.
- Security vulnerabilities: please do not open a public issue — report them privately through GitHub Security (Report a vulnerability).
Disclaimer
This plugin is not related to or partnered with 8x8 Inc. nor with "Jitsi as a Service" (JaaS).
License
Licensed under the GNU GPL v3.