Download the PHP package niklan/drupal-starter without Composer
On this page you can find all versions of the php package niklan/drupal-starter. It is possible to download/install these versions without Composer. Possible dependencies are resolved automatically.
Download niklan/drupal-starter
More information about niklan/drupal-starter
Files in niklan/drupal-starter
Package drupal-starter
Short Description A project template for Drupal projects with a slightly different structure.
License GPL-2.0-or-later
Homepage https://github.com/niklan/drupal-starter
FAQ
Example:
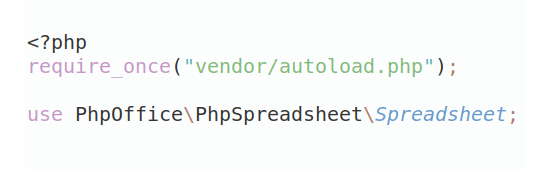
In general, it is recommended to use always a project to download your libraries. In an application normally there is more than one library needed.
- Some hosting areas are not accessible by a terminal or SSH. Then it is not possible to use Composer.
- To use Composer is sometimes complicated. Especially for beginners.
- Composer needs much resources. Sometimes they are not available on a simple webspace.
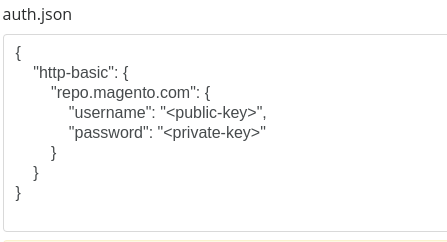
- If you are using private repositories you don't need to share your credentials. You can set up everything on our site and then you provide a simple download link to your team member.
- Simplify your Composer build process. Use our own command line tool to download the vendor folder as binary. This makes your build process faster and you don't need to expose your credentials for private repositories.
Informations about the package drupal-starter
Drupal Starter
Drupal Starter is a composer template designed for creating new Drupal projects.
It is very similar to the drupal/recommended-project template, but with a few
modifications that alter the project structure.
Installation
About template
The main idea of this project is to move all custom and project-related code,
files, assets, and other files outside the public directory web/. This will
make the project more secure because nothing will be accessible on the public
web unless you explicitly make it so. The new structure will also make it easier
to navigate through the project and configure the IDE.
local/
This folder is used to store environment-specific settings. By default, it will create a file called 'settings.php' for local settings, which are related to the project's current environment. If no 'settings.php' file already exists, it will be created only once and will never be overwritten.
This folder is included in the gitignore list because it contains information that should only be available in the specific environment where the project is running.
app/
This folder is used to store Drupal and PHP code. You can give it any name you like, for example:
./app/modules/my_module./app/themes/my_theme./app/profiles/my_profile
For example, you can also create a Drupal folder and name it according to
the namespace. For instance, code with the namespace Drupal/foo/Bar will be
located at:
./app/Drupal/foo/src/Bar/Baz.php
The logic behind this naming scheme is that it helps you easily identify the source code for a specific part of your project.
assets/
The assets folder is where you can store all the files that need to be in the
project repository but are not part of any custom code or third-party libraries.
This is a great place to keep local patches, files used by the 'drupal:scaffold' composer plugin, as well as any third-party libraries you want to use in your project.
config/
The config directory is where you keep all the settings for your project. This
includes configuration files for Drupal, PHPCS, PHPStan, PHPUnit, CSPell,
ESlint, Stylelint, and other tools.
var/
The var directory is a storage space for any content you need. Since it is
excluded from git, it is used by default for the public://, private://, and
temporary:// stream wrappers.
It is important to note that all these folders, when properly used, will not be
accessible to the public because they are located outside the web/ directory.
The public:// option is added through a symbolic link, which means you can
safely delete the entire web/ directory, run composer install again, and
everything will continue to work without any data loss.
This approach also makes it easier and more efficient to make backups by
excluding the entire web/ from them. All its contents can be downloaded via
composer or stored in the assets or var folders.
web/
The web/ directory serves as the public directory where Drupal and other
public code are located. If you intend to make something public by placing it in
the web/ directory, you should do so explicitly.
Custom modules, themes, profiles, and third-party libraries are installed using
Composer by creating a symbolic link. Alternatively, you can utilize the
drupal:scaffold Composer plugin (see the FAQ section for more information).
Shared directories such as public:// are linked to the var/ directory.
FAQ
How to install my modules/themes/profiles?
All Drupal extensions, including custom ones, must have a valid composer.json
file. If you have it, everything is easy.
For instance, you have the example module located in the
./app/Drupal/example path. This module contains the following composer.json
file:
Everything you need to do is to require it as a proper dependency:
It will be installed into the following directory:
./web/modules/custom/example, using a symbolic link.
The same process applies to other types of extensions, just use the appropriate type:
drupal-custom-modulefor modulesdrupal-custom-themefor themesdrupal-custom-profilefor profiles.
How to install a third-party library?
For example, you want to use the quicklink module. It can attach a library via a CDN, but you also have the option to provide a local copy. Drupal will serve and aggregate this local copy.
Most Drupal modules expect third-party libraries to be located under
./web/libraries. This is great for us because it makes it easy to use the
drupal:scaffold composer plugin and composer in general.
There are two ways to solve this problem. Choose whichever one you prefer.
Using composer (recommended)
This approach is similar to the one used for modules, themes, and profiles. The only difference is that you need to define the library manually.
To do this, add a composer.json file to the library folder, for example:
./assets/vendor/photoswipe/composer.json:
[!NOTE] Composer will use the package name to create a folder. In the example above, it is photoswipe. Since Drupal modules are likely to search for libraries in a specific folder, the name of the library in the composer.json file is crucial.
To avoid conflicts with other project packages, it is recommended to use your project name with an "-asset" suffix for the third-party assets:
[project-name]-suffix/[library-name]. This helps in keeping the organization clean and prevents naming conflicts within the project.
Then, simply require it like any other package:
This will copy all the files to the ./web/libraries/photoswipe folder.
Pros:
- Familiar approach with Composer: This method is familiar if you've worked with Composer before.
- Automatic File Installation: All necessary files are automatically installed (it's a good practice to include only essential files and exclude tests, demos, etc.).
- Automatic File Updates: Symlinks keep the files updated automatically, allowing for easier on-the-fly changes and testing.
- Removal of Directory on Dependency Removal: When a dependency is removed, the directory (symlink) is also removed, keeping your project tidy.
- Clear Dependency Management: You can set it as a dependency for specific modules or themes, making it clearer who is requiring any asset in the project. TIP: Don't forget to maintain asset version!
Cons:
- Maintenance of
composer.jsonfile: Requires preparing and maintaining thecomposer.jsonfile for each asset. - Potential for Additional Files: Since it's a symlink to the whole directory, if you copy-paste everything from libraries, you might end up with some additional files publicly accessible.
[!TIP] Since this approach is recommended, it is already preconfigured in the
composer.jsonfile. If you decide not to use it, you can safely remove this repository:
Using drupal:scaffold
- Download and save library (
quicklink.umd.js) at./assets/vendor/quicklink/quicklink.umd.js. -
Update
composer.json:extra.drupal-scaffold.file-mapping: - Run the command
composer drupal:scaffold. That's all! The code will also be copied during the composer install process, so you don't need to worry anymore — just update the vendor file.
The only drawback to this approach is that the drupal:scaffold plugin doesn't
allow you to copy directories. This can make it a bit frustrating to use when a
library uses multiple files, for example:
Pros:
- Only explicitly listed files will be scaffolded.
Cons:
- When removing a file from scaffolding, previously scaffolded files are not automatically removed, which can lead to a buildup of useless assets.
- If an asset consists of multiple files (like 10+), it can be tedious to configure and maintain.
- Dependencies cannot be managed properly because you cannot require such a dependency for a module or theme.
How to run tool X?
Since the configurations have been moved to the ./config directory, it can be
confusing to run these tools now:
- PHPCS:
phpcs --standard=config/phpcs.xml - PHPCBF:
phpcbf --standard=config/phpcs.xml - PHPStan:
phpstan --configuration=config/phpstan.neon - PHPUnit:
phpunit --configuration=config/phpunit.xml - ESLint:
eslint -c config/.eslintrc.json - Stylelint:
stylelint -c config/.stylelintrc.json - CSPell:
cspell --config config/.cspell.json
A bit unusual, isn't it? But there are ways to make it easier. You can use composer, yarn, or npm scripts. Or you can try a great tool called Taskfile. Check out the dedicated section for a drop-in solution.
Configuring PHPStorm
- Go to PHP | Composer and disable the option to "Add packaged as libraries".
- Go to PHP | Include path and remove everything that is currently added.
- Click on "Add include path" (the plus icon), then select only the
./vendorand./webdirectories.
- Identify your custom modules, themes, and profiles, under
.web/directory, select their folders, and click "Exclude". You should exclude the following paths (if exists):./web/modules/custom./web/themes/custom./web/profiles/custom
- Save the settings and close the panel.
- In the project structure, exclude the following directories from the index:
./local./var./vendor./web
This approach has several advantages:
- Your custom code will be intensively indexed in the
./app/*directory. This not only reduces the load on your system and PHPStorm's resource consumption but also speeds up autocompletion. - The
./vendorand./webdirectories will still be indexed, but less frequently. Changes will be found instantly, though. - All suggestions, searches, and other features will continue to work as usual.
- Code from Drupal and vendors will be highlighted with a different background, which can be helpful in some cases to distinguish your code from others.
By default, the search will only look in the project files. To search everywhere, you need to double the last keybind: Ctrl + Shift + F + F or Ctrl + N + N. Yellow rows indicate third-party files.
What else?
To avoid making the template too complex, some aspects have been intentionally simplified.
Monolog
If you're concerned about log files, there's a great opportunity to start using
the Monolog module. It allows you to store all logs in the ./var/log
directory.
- Require module
composer require drupal/monolog. -
Create
./assets/scaffold/monolog.services.yml. -
Add it into scaffold:
-
Update global settings:
./assets/scaffold/settings.php: composer drupal:scaffolddrush en monolog
That's it! Now you'll find your logs in the ./var/log directory.
Taskfile
Taskfile is a fantastic tool that can be used even on shared hosting platforms! It simplifies many tasks, which is why it's worth mentioning. You can use Taskfile to easily call PHPUnit, PHPCS, or any other tool you need.
Here's a sample Taskfile.yml file you can use as a starting point:
./Taskfile.yml
Simply drop it into the root folder and remove any unnecessary files. That's it!
Is there an open-source project that uses this approach?
Want to see a real-world example of this approach in action? No problem! You can check out the source code of my blog. You can run it locally and play with the structure to see how a real project uses it. This is a better way to understand and apply the concept than just relying on theories.
Similar projects
All versions of drupal-starter with dependencies

drupal/core-composer-scaffold Version ^11
drupal/core-recommended Version ^11
drush/drush Version ^13
niklan/composer-directories Version ^1.0