Download the PHP package marekmiklusek/database-backup without Composer
On this page you can find all versions of the php package marekmiklusek/database-backup. It is possible to download/install these versions without Composer. Possible dependencies are resolved automatically.
Download marekmiklusek/database-backup
More information about marekmiklusek/database-backup
Files in marekmiklusek/database-backup
Package database-backup
Short Description Automated MySQL and MariaDB backups to local disk and Google Drive, with retention cleanup.
License MIT
FAQ
Example:
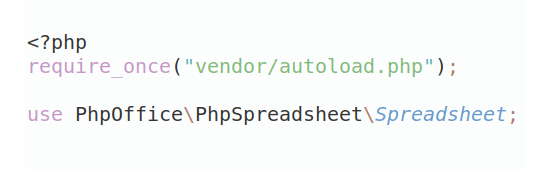
In general, it is recommended to use always a project to download your libraries. In an application normally there is more than one library needed.
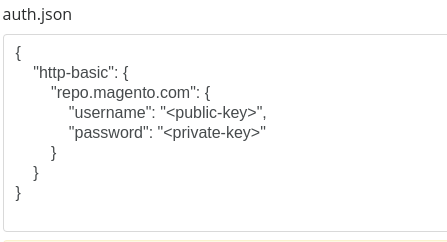
- Some hosting areas are not accessible by a terminal or SSH. Then it is not possible to use Composer.
- To use Composer is sometimes complicated. Especially for beginners.
- Composer needs much resources. Sometimes they are not available on a simple webspace.
- If you are using private repositories you don't need to share your credentials. You can set up everything on our site and then you provide a simple download link to your team member.
- Simplify your Composer build process. Use our own command line tool to download the vendor folder as binary. This makes your build process faster and you don't need to expose your credentials for private repositories.
Informations about the package database-backup




Automated MySQL and MariaDB backups for Laravel. Dumps go to the local disk, to Google Drive, or to both, and old backups are cleaned up on a retention schedule you set.
Features
- Simple and automated MySQL database backups
- Multiple storage options:
- Local storage
- Google Drive integration
- Simultaneous backup to multiple locations
- Command-line interface for easy management
- Automatic cleanup of old backups
- Customizable backup settings
- Minimal configuration required
- Fully tested: 100% code coverage and 100% type coverage
System Requirements
Ensure your system meets the minimum version requirements before installing this package.
- PHP 8.4+
- Laravel 13+
The package depends on individual illuminate/* components rather than the full
framework, so it never dictates which Laravel version your application runs.
Installation
Step 1: Install the Package
Step 2: Publish Configuration
Upgrading
A published config/database-backup.php overrides the package's own, so a
config file from an older version keeps its old defaults and the package
behaves as if nothing changed. After upgrading, republish it:
Projects that never published the config need no action.
Storage Configuration
Backups are stored locally by default using the local disk.
With use_both_disks set to true, each backup is written locally and
uploaded to Drive. With it false, the backup goes to whichever disk disk
names, and a Drive upload removes the local copy afterwards.
Backups are named {prefix}_{date}.sql, for example shop_2026-08-25_14-30-00.sql.
Cleanup only ever deletes files matching that pattern, so anything else you keep
in the directory is left alone.
Usage
Run a Backup
To create a new backup, run the following Artisan command:
Clean Up Old Backups
- By default, old backups are automatically cleaned up after each backup.
- Backups older than 14 days are automatically deleted to free up space.
- This retention period is configurable, allowing you to adjust how long backups are kept based on your needs.
Disabling Automatic Cleanup
If you want to disable automatic cleanup, you can set the automatic option to false in the configuration file:
If you prefer to manually clean up old backups, you can run the following Artisan command:
TLS/SSL Connections
No configuration needed. The package always asks the dump client for an encrypted connection and skips certificate verification, so a server that forces TLS works out of the box.
It picks the dump client itself too: if mariadb-dump is on the PATH it uses that binary and the MariaDB SSL syntax, otherwise mysqldump and ssl-mode.
Verified connection (recommended when you have the CA certificate):
VERIFY_CA and VERIFY_IDENTITY require MYSQL_ATTR_SSL_CA; without it the backup fails with a clear error instead of silently connecting unverified.
Overrides, only if auto-detection guesses wrong:
After changing .env, clear the config cache:
Google Drive Integration
Step 1: Configure Google Drive
Add the following configuration to config/filesystems.php:
NOTE: you can customize the disk name (e.g., google_db_backup instead of google).
If you rename the disk, point the package at it in config/database-backup.php:
google_disk is what the package reads when uploading to Drive, so storage.disk
can stay local while use_both_disks is on.
Step 2: Environment Variables
Add these variables to your .env file:
Google Drive API Setup Guide
This guide will walk you through setting up Google Drive API credentials and obtaining the necessary tokens for integration with your Laravel application.
Step 1: Create Google Cloud Project
- Visit Google Cloud Console
- Click "Select a project" → "New Project"
- Enter a project name and click "CREATE"
- Wait for the project to be created and select it
Step 2: Enable Google Drive API
- In the left sidebar, navigate to "APIs & Services" → "Library"
- Search for "Google Drive API"
- Click on "Google Drive API"
- Click "ENABLE"
Step 3: Configure OAuth Consent Screen
- Go to "APIs & Services" → "OAuth consent screen"
- Select "External" user type and click "CREATE"
- Fill in the required information:
- App name
- User support email
- Developer contact information
- Click "SAVE AND CONTINUE"
- Skip scopes screen by clicking "SAVE AND CONTINUE"
- Add test users (your email) if in testing mode
- Click "SAVE AND CONTINUE"
Step 4: Create Credentials
For Web Application:
- Go to "APIs & Services" → "Credentials"
- Click "+ CREATE CREDENTIALS" → "OAuth client ID"
- Select "Web application" as application type
- Enter a name for your client
-
Under "Authorized redirect URIs" add:
- Click "CREATE"
- A popup will show your Client ID and Client Secret
- Add them to your
.envfile asGOOGLE_CLIENT_IDandGOOGLE_CLIENT_SECRET
For Desktop Application:
- Go to "APIs & Services" → "Credentials"
- Click "+ CREATE CREDENTIALS" → "OAuth client ID"
- Select "Desktop app" as application type
- Enter a name for your client
- Click "CREATE"
- A popup will show your Client ID and Client Secret
- Add them to your
.envfile asGOOGLE_CLIENT_IDandGOOGLE_CLIENT_SECRET
Step 5: Get Refresh Token
For Web Application:
- Go to Google OAuth Playground
- Click the gear icon (⚙️) in the top right corner
- Check "Use your own OAuth credentials"
- Enter your:
- OAuth Client ID
- OAuth Client Secret
- Click "Close"
- In the left sidebar, find "Drive API v3"
- Select
https://www.googleapis.com/auth/drive.file - Click "Authorize APIs"
- Log in with your Google account and accept permissions
- Click "Exchange authorization code for tokens"
- Copy the refresh token from the response and add it to your
.envfile asGOOGLE_REFRESH_TOKEN
For Desktop Application:
- Open the following URL in your web browser (replace
YOUR_CLIENT_IDwith your actual client ID): https://accounts.google.com/o/oauth2/auth?client_id=YOUR_CLIENT_ID&redirect_uri=urn:ietf:wg:oauth:2.0:oob&response_type=code&scope=https://www.googleapis.com/auth/drive.file&access_type=offline&prompt=consent- Using the scope
https://www.googleapis.com/auth/drive.fileallows your application to view and manage Google Drive files and folders that were opened or created by the app
- Using the scope
- Sign in with your Google account and grant access to the requested permissions
- Google will display an authorization code on the screen. Copy this code
-
In your terminal run the following
curlcommand, to exchange the authorization code for tokens (replace YOUR_AUTHORIZATION_CODE, YOUR_CLIENT_ID, and YOUR_CLIENT_SECRET with the actual values): - The response will include a refresh token. Copy it and store it in your
.envfile asGOOGLE_REFRESH_TOKEN
Step 6: Get Google Drive Folder ID
- Go to Google Drive
- Create a new folder or select an existing one for backups
- Open the folder
- Copy the folder ID from the URL
- The URL will look like:
https://drive.google.com/drive/folders/1A2B3C4D5E6F7... - The folder ID is the string after
/folders/
- The URL will look like:
- Add this folder ID to your
.envfile asGOOGLE_FOLDER_ID
Email Notifications
The package can email you when a backup or cleanup finishes. All four events are off by default:
Set the ones you want to true and make sure your MAIL_* settings are
configured. Failure notifications include the error message.
Events
This package emits the following events that you can listen to in your application:
MarekMiklusek\DatabaseBackup\Events\BackupCreated
Triggered when a database backup is successfully created.
MarekMiklusek\DatabaseBackup\Events\BackupFailed
Triggered when a database backup fails.
Common Issues
- Redirect URI Mismatch: Make sure you've added the exact OAuth Playground URL to authorized redirect URIs
- Invalid Credentials: Double-check all IDs and tokens are copied correctly
- Token Expiration: Refresh tokens don't expire unless revoked, but if you create new credentials, you'll need a new refresh token
- Permission Issues: Ensure the Google Drive API is enabled and the correct scope is selected
Security Notes
- Keep all credentials secure and never commit them to version control
- Use environment variables for all sensitive information
- Consider implementing credential rotation for production environments
License
The MIT License (MIT). Please see License File for more information.
All versions of database-backup with dependencies

illuminate/console Version ^13.0
illuminate/events Version ^13.0
illuminate/filesystem Version ^13.0
illuminate/http Version ^13.0
illuminate/notifications Version ^13.0
illuminate/support Version ^13.0
nesbot/carbon Version ^3.10