Download the PHP package guillaumetissier/auth-server without Composer
On this page you can find all versions of the php package guillaumetissier/auth-server. It is possible to download/install these versions without Composer. Possible dependencies are resolved automatically.
Download guillaumetissier/auth-server
More information about guillaumetissier/auth-server
Files in guillaumetissier/auth-server
Package auth-server
Short Description Standalone OAuth 2 authorization server: Authorization Code + PKCE, TOTP 2FA, DPoP-bound tokens.
License MIT
FAQ
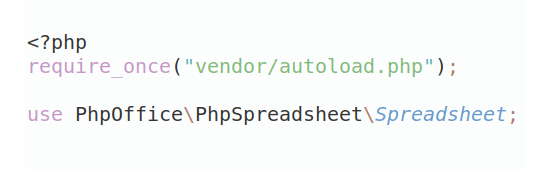
Example:
In general, it is recommended to use always a project to download your libraries. In an application normally there is more than one library needed.
- Some hosting areas are not accessible by a terminal or SSH. Then it is not possible to use Composer.
- To use Composer is sometimes complicated. Especially for beginners.
- Composer needs much resources. Sometimes they are not available on a simple webspace.
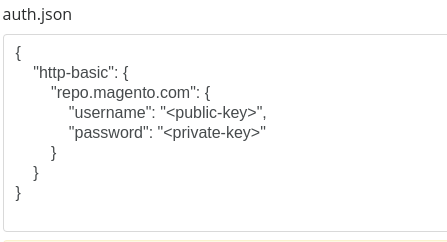
- If you are using private repositories you don't need to share your credentials. You can set up everything on our site and then you provide a simple download link to your team member.
- Simplify your Composer build process. Use our own command line tool to download the vendor folder as binary. This makes your build process faster and you don't need to expose your credentials for private repositories.
Informations about the package auth-server
Auth Server
A sign-in server for your own applications. Users sign in once, here (password + code from an authenticator app), and your applications receive a token proving who the user is. Your applications never see passwords.
It is a standard OAuth 2 authorization server (Authorization Code + PKCE), with TOTP two-factor authentication, DPoP-bound tokens (RFC 9449), audited impersonation for support staff, and optional domains and rights.
Contents
- Words used in this guide
- What you need to install
- Start it on your computer (development)
- Everyday commands and troubleshooting
- Production deployment
- Using the application
- Development without Docker
- Reference documentation
1. Words used in this guide
| Word | Meaning |
|---|---|
| Auth server | This project. It shows the sign-in pages and issues tokens. |
| Application (or client) | A website or app of yours that lets users sign in through the auth server. Each one is registered once with an identifier (client_id), e.g. my-spa. |
| User | A person who signs in. Each user has a username, a password and an external id. |
| External id | The id of the user in your application's database (e.g. 42). The auth server puts it in the token (claim sub), so your application knows which of its users signed in. While trying things out, any number works. |
| Token | A signed piece of text the application receives after sign-in and sends with each request to its API. The access token lives 15 minutes; the refresh token gets a new one without signing in again. |
| 2FA / TOTP | Two-factor authentication: after the password, a 6-digit code from an authenticator app on a phone (Google Authenticator, Microsoft Authenticator, FreeOTP, 1Password, …). The code changes every 30 seconds. |
| DPoP | Protection that makes a stolen token useless: each request also carries a proof signed by a key that never leaves the application. |
| Issuer | The public address of the auth server, e.g. http://localhost:8080 on your computer or https://auth.example.com in production. |
| Docker | A tool that runs the auth server and its database in isolated "containers", so you do not need to install PHP or MySQL yourself. |
| Terminal | The window where you type commands (Terminal on macOS and Linux, Ubuntu/WSL on Windows). Every command of this guide is typed there and confirmed with Enter. |
2. What you need to install
You need Git, Docker (with Docker Compose v2), make and openssl. PHP is not needed to run the server.
Linux (Ubuntu or Debian)
Log out and log in again (or restart) so that the last command takes effect.
macOS
- Install Docker Desktop and start it (whale icon in the menu bar).
- In a terminal, install Git and make:
xcode-select --install. openssl is already there.
Windows
- Install WSL 2 with Ubuntu: open PowerShell as administrator, run
wsl --install, restart, then open "Ubuntu" from the Start menu and choose a Linux username and password. - Install Docker Desktop, and in its settings enable Resources → WSL integration → Ubuntu.
- In the Ubuntu window:
sudo apt update && sudo apt install -y git make openssl.
Type every command of this guide in the Ubuntu window, not in PowerShell.
Check
If one of them fails, see Troubleshooting.
Optional: PHP, to try tokens from the command line
Only needed for step 3.9 (seeing a token) and for the tests. On Ubuntu 24.04 or Debian 13:
(Older Ubuntu versions ship an older PHP: add ppa:ondrej/php first. macOS: brew install php composer.)
3. Start it on your computer (development)
3.1 Download the project
All the following commands are run from this auth-server folder.
3.2 Create the settings file
Expected output: Secrets written to .env.docker (ignored by git).
This creates the file .env.docker with random passwords and keys. Keep it: if you delete it after
the first start, the database will refuse the new passwords (see Troubleshooting).
The defaults are right for your computer; nothing to edit now.
3.3 Start the server
The first time, this downloads and builds everything: allow 3 to 10 minutes. The command returns when the server is ready and ends with lines such as:
At its first start the server creates its signing keys and its database tables by itself.
Three containers run: the server, its MySQL database, and Mailpit, which catches the e-mails the server sends (password links) so that you can read them at http://localhost:8025 without a real mail server.
3.4 Check that it answers
Expected: {"status":"ok"}. You can also open http://localhost:8080/health in your browser.
3.5 Register an application
The auth server only accepts sign-ins coming from registered applications. Register a test one:
my-spais the identifier of the application.http://localhost:5173/callbackis where the browser is sent back after sign-in. Nothing needs to run there for this test.
3.6 Create a user
You are asked for a password (at least 12 characters). Nothing is displayed while you type: this is
normal. Expected: [OK] User "alice" created (sub = 42).
EMAIL is optional; it is where "Forgot your password?" links are sent. In development, they arrive in
Mailpit (http://localhost:8025), whatever the address.
3.7 Sign in
- Open http://localhost:8080/login in your browser.
- Enter
aliceand her password, click Continue. - You arrive on the dashboard. It warns that two-factor authentication is not enabled yet. The navigation bar leads to My profile (e-mail address, password, two-factor authentication).
3.8 Set up two-factor authentication
- On the dashboard, click Set it up (or, on My profile, Set up two-factor authentication).
- On your phone, open your authenticator app, choose "add an account", and scan the QR code shown on the page (or type the secret displayed under it, without the spaces).
- Type the 6-digit code shown by the app and click Activate.
- The page then shows 10 backup codes. Each one replaces a phone code once, if you lose the phone. Write them down, then click I have saved them, continue.
From now on, signing in as alice asks for the password and a code from the app.
When users sign in through an application, the server asks them to set up 2FA by itself. With the default setting (grace period), they can click Later. The super-administrator changes this in Settings, see Migrating existing users.
3.9 See the token an application receives (optional, needs PHP)
This step plays the role of an application from the command line, to see the whole sign-in flow. It needs PHP (see Optional: PHP).
-
Install the PHP libraries used by the tool (once, takes a minute):
-
Print a sign-in address:
- Copy the long address it prints (starting with
http://localhost:8080/authorize?) into your browser. Sign in if asked (password, then the code of your app). - The browser ends on an address starting with
http://localhost:5173/callback?code=and shows "This site can't be reached". This is expected: no application listens there. Copy the value aftercode=up to&state(excluded) from the address bar. -
Within 5 minutes (the code expires), exchange it for tokens:
- Look at what the token contains, then check it as an API would:
php tools/oauth-cli.php refresh gets new tokens with the refresh token. php tools/oauth-cli.php help
lists everything.
3.10 Become an administrator
Administrators manage users and rights in the browser, and can impersonate users.
Sign out and in again: the navigation bar now shows Users, Domains and Resource types, and the dashboard shows figures about the accounts. See Using the application.
You now have a working auth server. To connect a real application, go to For developers.
4. Everyday commands and troubleshooting
Run these from the auth-server folder.
| To… | Type |
|---|---|
| Stop the server (data is kept) | make down |
| Start it again | make up |
| See what the server writes (errors, requests); Ctrl+C to stop watching | make logs |
| See if it runs | docker compose ps |
| Read the e-mails the server sent (development) | open http://localhost:8025 |
Apply a change made in .env.docker |
docker compose up -d |
List every make command |
make help |
| Delete everything (users, clients, keys) and start from zero | docker compose down -v, then make up |
Troubleshooting
| Message or symptom | Cause and fix |
|---|---|
make: command not found |
Install make (see section 2). |
permission denied while trying to connect to the Docker daemon socket |
Run sudo usermod -aG docker $USER, then log out and in again. |
Cannot connect to the Docker daemon |
Docker is not started: start Docker Desktop (macOS, Windows), or sudo systemctl start docker (Linux). |
docker: 'compose' is not a docker command |
Docker Compose v2 is missing: reinstall Docker as in section 2. The old docker-compose is not supported. |
env file .env.docker not found |
Run make secrets first. |
Bind for 0.0.0.0:8080 failed: port is already allocated |
Another program uses port 8080. Use another port: set APP_ISSUER=http://localhost:8081 in .env.docker, then start with AUTH_SERVER_PORT=8081 make up. Use http://localhost:8081 everywhere in this guide, and prefix the tool commands with ISSUER=http://localhost:8081. |
container auth-server-auth-db-1 is unhealthy, or Access denied for user 'auth' in make logs |
The database was created with other passwords (usually .env.docker was deleted and recreated). If you have no data to keep: docker compose down -v, then make up. |
the input device is not a TTY |
You ran a make command from a script or cron: use make purge (made for it) or docker compose exec -T auth-server php bin/console …. |
| "Invalid credentials" on the login page | Wrong username or password. After 5 failures from the same computer, wait 15 minutes; after 10 failures in total, the account is locked for 30 minutes. |
| The 6-digit code is refused | Check the time of the phone and of the computer (automatic time on both). Each code works once. |
token answers invalid_grant |
The code is older than 5 minutes or was already used: start again from authorize-url. |
composer install complains about a missing ext-… |
Install the matching PHP package, e.g. ext-pdo_mysql → php8.3-mysql, ext-pdo_sqlite → php8.3-sqlite3. |
| "Forgot your password?" sends nothing | The account has no e-mail address (an administrator adds it on the user's page), or the e-mail failed: make logs shows password_link.send_failed and the reason. In development the e-mails are in http://localhost:8025. |
| "The e-mail could not be sent" when creating a user | MAILER_DSN in .env.docker is wrong or the mail server refuses the connection. Fix it, docker compose up -d, then Send a password link on the user's page. |
container auth-server-auth-server-1 is unhealthy, and make logs says Cache directory … cannot be created |
The disk is full (df -h). Free space (docker system prune, docker builder prune), then docker compose up -d --force-recreate. |
| Anything else | make logs shows the error. |
5. Production deployment
This section installs the auth server on an Internet-facing Linux server, at an address such as
https://auth.example.com. Replace auth.example.com and app.example.com by your own names.
What you need
- A Linux server (Ubuntu 24.04 or Debian 12, 1 GB of RAM or more) you can reach with
ssh. - A domain name, and access to its DNS settings.
- Ports 80 and 443 open towards the server (TLS certificates are obtained on port 80).
5.1 Point the name to the server
At your DNS provider, create an A record auth.example.com → the IP address of the server. Check
from your computer, after a few minutes: ping auth.example.com shows the server's IP.
5.2 Install the tools on the server
Connect with ssh, then install Git, make, openssl and Docker exactly as in
section 2, Linux, and log out and in again.
5.3 Download the project and create the settings
Open the settings file with a text editor (nano .env.docker; in nano, Ctrl+O then Enter saves,
Ctrl+X quits) and change these lines:
APP_ISSUER: the public address, withhttps://and without a trailing slash.TRUSTED_PROXIES=PRIVATE_SUBNETS: tells the server that requests come through the HTTPS proxy of step 5.5.CORS_ALLOWED_ORIGINS: the addresses of your browser applications, comma-separated.TOTP_ISSUER: the name users will see in their authenticator app.
Then the e-mails (password links). Give the address of your mail server, as your mail provider documents it (host, port, user, password), and the sender address:
Special characters in the password must be URL-encoded (@ becomes %40, / becomes %2F).
Optionally, the webhooks (WEBHOOK_URLS): see
Configuration.
Back up .env.docker somewhere safe (a password manager): without it, the two-factor secrets
stored in the database cannot be read.
5.4 Keep the server port private
The server must only be reached through HTTPS. Publish its port on the server itself only:
(Docker publishes ports around the firewall, so this setting matters even with a firewall.)
5.5 Start the server
The containers restart by themselves after a reboot.
5.6 Add HTTPS with Caddy
Caddy is a web server that obtains and renews TLS certificates automatically.
Replace the content of the file by:
Then:
Check from your computer: https://auth.example.com/health shows {"status":"ok"} with a padlock.
If not: sudo journalctl -u caddy --since "10 minutes ago" shows why (usually the DNS record or a
closed port 80).
(Any other reverse proxy works, e.g. nginx with certbot: forward to 127.0.0.1:8080 and set the
X-Forwarded-For, X-Forwarded-Proto and X-Forwarded-Host headers.)
5.7 Create the first accounts
Sign in at https://auth.example.com/login and set up two-factor authentication at once (step 3.8):
administrators need it. Then create the other accounts from Users → New user: each person receives
an e-mail to choose his password. Check that the e-mails arrive with your own address first ("Forgot your
password?" on the sign-in page). To bring existing users with their current passwords, see
Migrating existing users.
The Mailpit container also runs in production, but receives nothing once MAILER_DSN points to your
mail server; it is reachable from the server itself only. docker compose stop mailpit stops it.
5.8 Schedule the clean-up
Expired tokens must be removed regularly. Open the scheduled tasks of your user with crontab -e
(choose nano if asked) and add this line:
5.9 Back up
Back up the database every day and keep .env.docker with the backups: see
Operations for the commands.
5.10 Upgrade
Database changes are applied automatically when the server starts. Read CHANGELOG.md before upgrading.
5.11 Monitor
Have a monitoring service call https://auth.example.com/health every minute: it answers
{"status":"ok"} (HTTP 200) when the server works.
6. Using the application
After signing in at /login, everyone arrives on the dashboard. The navigation bar at the top leads
to the other pages.
For users
| Page | What for |
|---|---|
Sign in (/login) |
Username, password, then the 6-digit code (or one backup code). Users usually arrive here through an application. |
| Forgot your password? (link on the sign-in page) | Give your username or e-mail address: a link to choose a new password is e-mailed to the address of the account. It works once, for 1 hour. |
Dashboard (/dashboard) |
Notifications: two-factor authentication not enabled, few backup codes left, no e-mail address. |
My profile (/account) |
Your account; change your e-mail address and your password; set up two-factor authentication, generate new backup codes, or disable 2FA when the policy allows it; your rights. |
- New phone: sign in with a backup code, then on My profile disable and set up 2FA again (if disabling is not allowed, ask an administrator to reset it).
- Lost phone and backup codes: an administrator resets your two-factor authentication.
- Too many failed attempts: wait 15 minutes; after 10 failures the account is locked for 30 minutes. A new password (through a password link) unlocks it.
- Changing the password ends your other sessions, and your applications must sign you in again.
For administrators
Who administers what:
| Who | Sees | Changes |
|---|---|---|
ROLE_SUPER_ADMIN (one account) |
everything | everything: accounts, domains, rights, roles |
ROLE_ADMIN (support staff) |
everything | nothing; impersonates users in read-only mode |
Holder of @access:w on a domain (e.g. its owner) |
the users of that domain and its subdomains | their accounts and rights, never beyond his own rights, never the owner above him |
Holder of @domain:w on a domain |
its subdomains | creates, renames and deletes its subdomains |
They see Users, Domains and Resource types in the navigation bar, and figures on the dashboard: number of accounts, share with two-factor, locked and disabled accounts, last sign-ins, last domains created, for the users they administer.
Users (/admin/users): search by username, e-mail or user id; two-factor and status at a glance.
- New user: username, user id in your application, e-mail address, domain. The person receives an e-mail with a link to choose his password (valid 7 days). Then give him rights on his page.
- On a user's page:
- Edit the username and e-mail address;
- Send a password link: he chooses a new password himself; nobody else ever knows it;
- Reset two-factor authentication (lost phone): he sets it up again at his next sign-in;
- Impersonate in …: act as him in an application, after giving a reason and a fresh 2FA code (see Impersonation);
- Rights: grant or remove rights per domain, and see what they give;
- Disable the account (he can no longer sign in, the applications can no longer renew his tokens; can be undone) or Delete the account (type its username to confirm; cannot be undone).
Settings (/admin/settings, super-administrator; ROLE_ADMIN only looks):
- Token security: whether applications must use DPoP (and the rule of each application), and whether confidential applications (with a secret) must use PKCE. Browser applications always use PKCE.
- Token lifetimes: access token (15 minutes by default), refresh token, that is how long users stay signed in to an application (30 days), and the two lifetimes of impersonations. Within limits, so that a mistake cannot make tokens last for years.
- Two-factor authentication: optional, grace period with the date from which it becomes required, or required.
They apply at once. Until they are changed there, the values of .env.docker apply.
Domains (/admin): the tree, with the number of users per domain. On a domain's page: rename it,
set its owner and owner rights, create subdomains, see and move its users, create a user in it, and
delete it when it is empty (no user, no subdomain).
Roles are given from a user's page (super-administrator) or on the command line:
Other administration commands (importing users, 2FA roll-out follow-up, impersonation audit) are listed in Operations. Domains and rights are explained in Domains and rights.
For developers: connecting an application
- Register the application:
make client ID=my-app REDIRECT=https://app.example.com/callback, and add its origin toCORS_ALLOWED_ORIGINS. - In the browser part, sign users in and call your API with the browser client of this repository,
packages/oauth-dpop-client(one file to copy, or download from the GitHub release). - In your PHP API (Laravel, Symfony or any PSR-15 framework), check the tokens with
guillaumetissier/resource-guard.
The complete walkthrough, with code, is in Connecting an application.
To see it all working before writing code, start the demo: a small React SPA and a Symfony API, each in its own container, showing the resources received or the reason of each refusal.
Addresses an application uses (also listed at /.well-known/oauth-authorization-server):
| Address | Purpose |
|---|---|
/authorize |
Sign-in page (Authorization Code + PKCE S256) |
/token |
Exchanges the code, refreshes tokens (DPoP proof required by default) |
/.well-known/jwks.json |
Public key to verify the tokens |
/impersonation/end |
Ends an impersonation |
/health |
Health check |
7. Development without Docker
For working on the server's code with PHP only, using an SQLite file as database. Needs the PHP packages of section 2.
The last command keeps running (Ctrl+C stops it); the server is at http://localhost:8080, and steps
3.7 to 3.9 work the same. Replace make <command> by the matching php bin/console command
(make help shows them in the Makefile). The keys above are for your computer only.
Tests, coding standard, static analysis and project layout: see Development.
8. Reference documentation
| Document | Content |
|---|---|
| Configuration | Every setting of .env.docker |
| Migrating existing users | Importing accounts with their passwords, rolling out 2FA |
| Connecting an application | Browser part, API part, webhooks |
| Domains and rights | Organisations, access expressions, administration, import |
| Impersonation | Who may act as whom, and how |
| Security model | What protects users and tokens |
| Operations | Commands, backups, scaling |
| Development | Tests, project layout, releasing, roadmap |
License
MIT, see LICENSE.
All versions of auth-server with dependencies

ext-ctype Version *
ext-iconv Version *
ext-json Version *
ext-openssl Version *
ext-pdo_mysql Version *
ext-sodium Version *
doctrine/doctrine-bundle Version ^2.13
doctrine/doctrine-migrations-bundle Version ^3.4
doctrine/orm Version ^3.3
endroid/qr-code Version ^6.0
guillaumetissier/resource-guard Version ^0.1
league/oauth2-server Version ^9.2
league/oauth2-server-bundle Version ^2.0
nyholm/psr7 Version ^1.8
scheb/2fa-backup-code Version ^7.6
scheb/2fa-bundle Version ^7.6
scheb/2fa-totp Version ^7.6
symfony/cache Version 7.4.*
symfony/clock Version 7.4.*
symfony/console Version 7.4.*
symfony/dotenv Version 7.4.*
symfony/framework-bundle Version 7.4.*
symfony/http-client Version 7.4.*
symfony/lock Version 7.4.*
symfony/mailer Version 7.4.*
symfony/monolog-bundle Version ^3.10 || ^4.0
symfony/psr-http-message-bridge Version 7.4.*
symfony/rate-limiter Version 7.4.*
symfony/security-bundle Version 7.4.*
symfony/twig-bundle Version 7.4.*
symfony/uid Version 7.4.*
symfony/var-exporter Version 7.4.*
symfony/yaml Version 7.4.*
web-token/jwt-library Version ^4.0